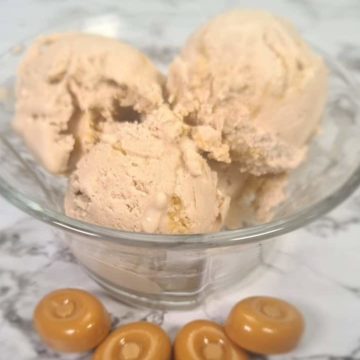
Homemade Butterscotch Ice Cream with a Caramel Swirl
In most stores here in Australia you can buy butterscotch ice cream with honeycomb through it.
But I wanted to do something a little different with my ice cream, and what goes better with butterscotch than caramel?
In this recipe, I will teach you how to make butterscotch ice cream with a caramel swirl, and all you need is an electric mixer of some kind.

Making Ice Cream on a Stovetop?
You may have been hunting around for ice cream recipes, and quite a lot of them involve cooking parts of the ice cream on the stove.
With my busy household, I do not always have time to do this method. Although I can assure you the end result is exactly the same as the one I use below to make the ice cream base.
However, I will show you the stove-cooked method in a future ice cream recipe.
How To Make The Butterscotch Ice Cream Colour Light Brown?
We all know butterscotch is not white; it is brown and if you are going to have butterscotch ice cream that should also be a light brown or beige.
When you make the ice cream, the initial colour is white, so you will need to turn it brown by using blue, red, and yellow food colouring.
You will need 1 part red, 1 part yellow, and 2 parts blue. You will get a dark brown color. But do not worry, you are putting that color into a white so you will get the light brown or beige color you want.
I do advise you to mix the colors in a separate bowl first and test it on some paper towel or white paper until you have the desired color you want.
Once you have the desired color, then go ahead and add it to your ice cream, a few drops at a time.
Be careful though the browner it may become, so only add a little at a time till you get your desired color. You can always add color, but you can not take it away.
If you are not up to mixing colors, you can buy brown food coloring gel. The brand Americolor makes a soft gel paste in a variety of colors including a chocolate brown.
I have not used this before, so I can not tell you how the color will come out. For anyone that tries it or has used it before, please feel free to share your thoughts on it.
How do you get the butterscotch flavour?
You can not have butterscotch ice cream without the butterscotch flavour.
And just like the Licorice Ice Cream recipe, I use the LorAnn oil to flavour it.
You can get the oil flavouring from Amazon.com, or if you are in Australia, I get the flavours from Lollipop Cake Supplies.
Adding the Caramel Swirl
In the method below, there are steps on how to add the caramel swirl to the ice cream. But I would like to give you a more in-depth description of how to do this.
I use my Caramel Sauce recipe, which is so simple to make. It freezes quite well within the ice cream and is not too hard to scoop, either.
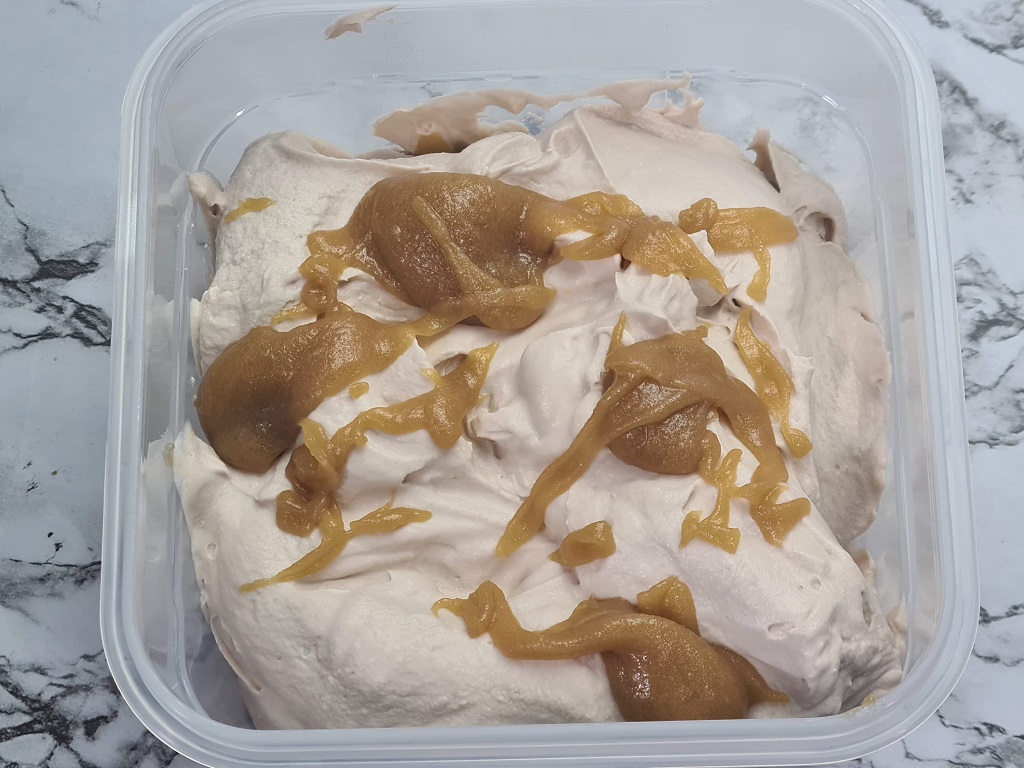
After making your butterscotch ice cream, it is time to add the caramel.
To do this you need to put a small layer of ice cream into your container or ice cream tub that you are planning to freeze it all in.
Put a few dollops of the caramel on the top. Do not cover the entire section in the caramel. Then repeat this step until you get to the top.
* NOTE: There needs to be caramel sauce on top of the last layer of ice cream. Dividing your ice cream into equal portions before putting it into the container can also help. I did mine in thirds.
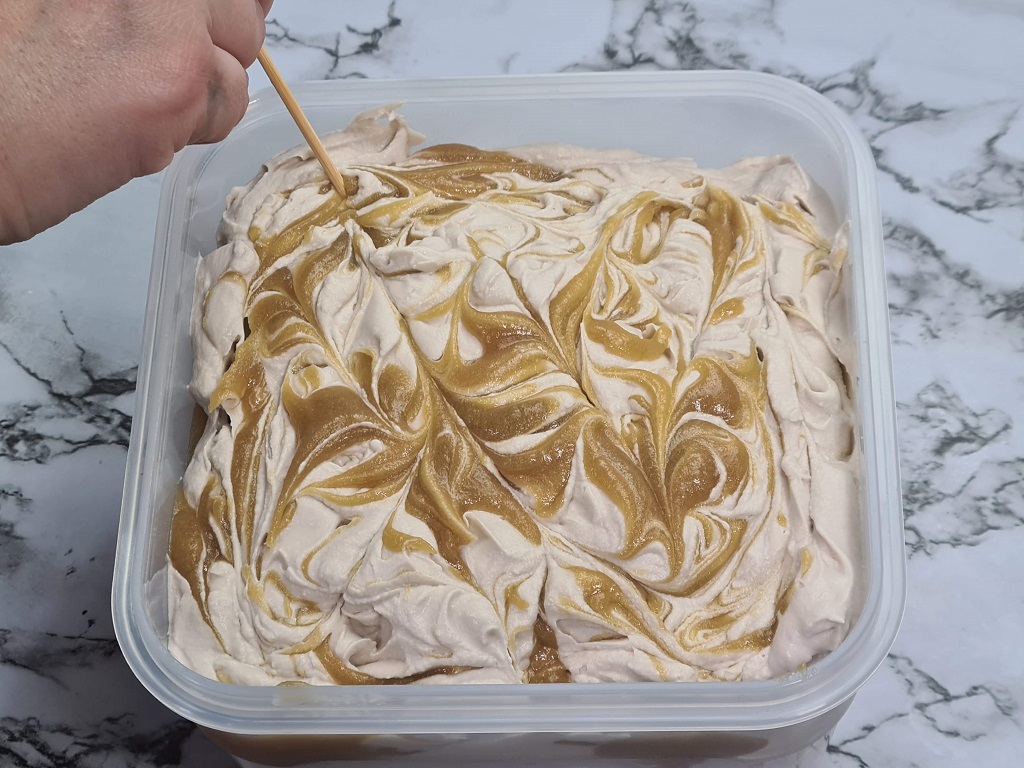
Using a skewer or the handle of a spoon swirl the caramel into the ice cream, being careful not to mix it through.
The best way to create the below effect is to drag the skewer from one side of the container to the opposite side. Making sure the skewer is touching the bottom of the container so that it creates the swirl effect all the way through
Other alternates to add to the Butterscotch Ice Cream.
If you are not a fan of the caramel swirl or you would like to add something different. Try crushing up the honeycomb and adding that to the ice cream instead.
Crushed plain sweet biscuits can also be added, or even some chocolate chips.
Do I Need A KitchenAid Ice Cream Bowl To Make Ice Cream?
Simply put, no, you do not need to own a KitchenAid Stand mixer or the KitchenAid Ice Cream Mixing Bowl to make your ice cream at home.
In this recipe, I will show you how to make the butterscotch Ice Cream with only the use of a stand mixer or hand mixer.
To make homemade ice cream, you do not need to spend loads of money on equipment. All my ice cream recipes that I make with LorAnn Oils can be made the exact same way in this recipe.
How To Make Butterscotch Ice Cream
Homemade Butterscotch Ice Cream with a Caramel Swirl
Equipment
- Stand mixer
Ingredients
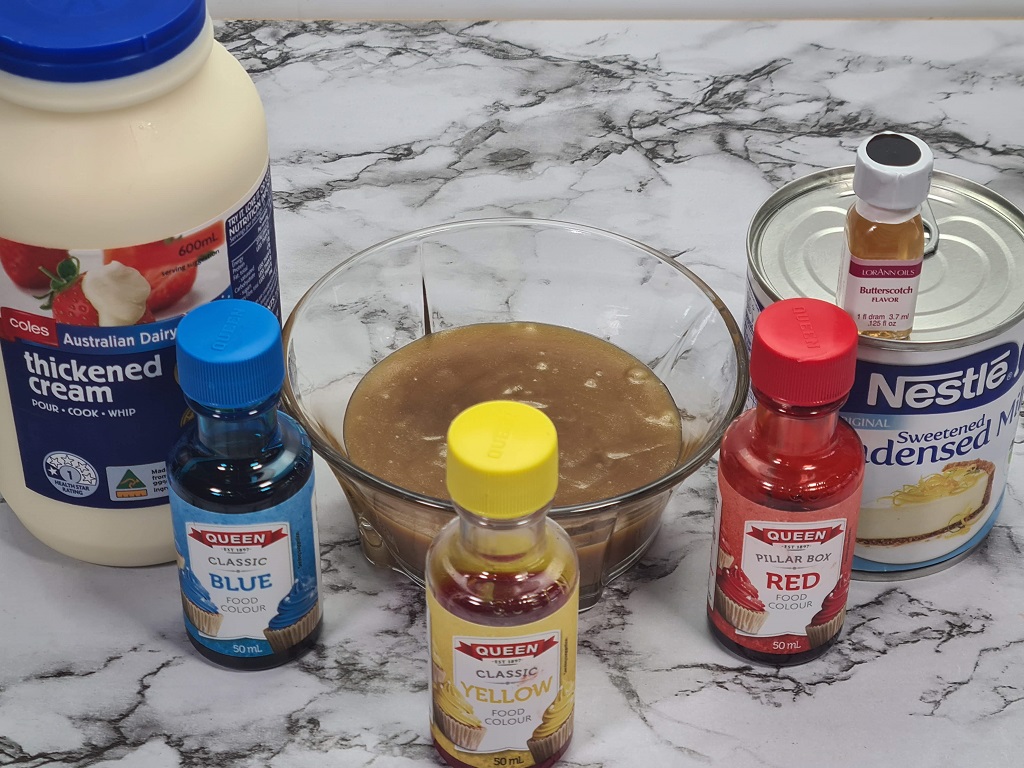
- 600 ml Thickened or Heavy Whipping Cream
- 3.7 ml Butterscotch Flavoring
- Red Food Colouring
- Yellow Food Colouring
- Blue Food Colouring
- 395 g Sweetened Condensed Milk
- 1 tsp Vanilla Extract
Instructions
- Mix together the red, yellow and blue food colouring, in the separate bowl to make brown if you do not have brown coloured food colouring.
- In a large mixing bowl add the cream, butterscotch flavouring, vanilla extract (optional) and a few drops of the brown food colouring. Whip until you get soft peaks.
- Add a few more drops at a time of the food colouring until you get the desired colour, while you are whipping the mixture.
- Add the cold condensed milk and mix through until all combined.
- In a container big enough to hold 2 litres (3.5 pints) of ice cream
- Add a third of the ice cream on the bottom of the container, followed by 4 to 5 dollops of the caramel sauce. Repeat, making sure caramel is placed on top of the last layer of ice cream.
- Swirl the caramel through the ice cream mixture, cover a place in the freezer for at least 2 hours before serving.