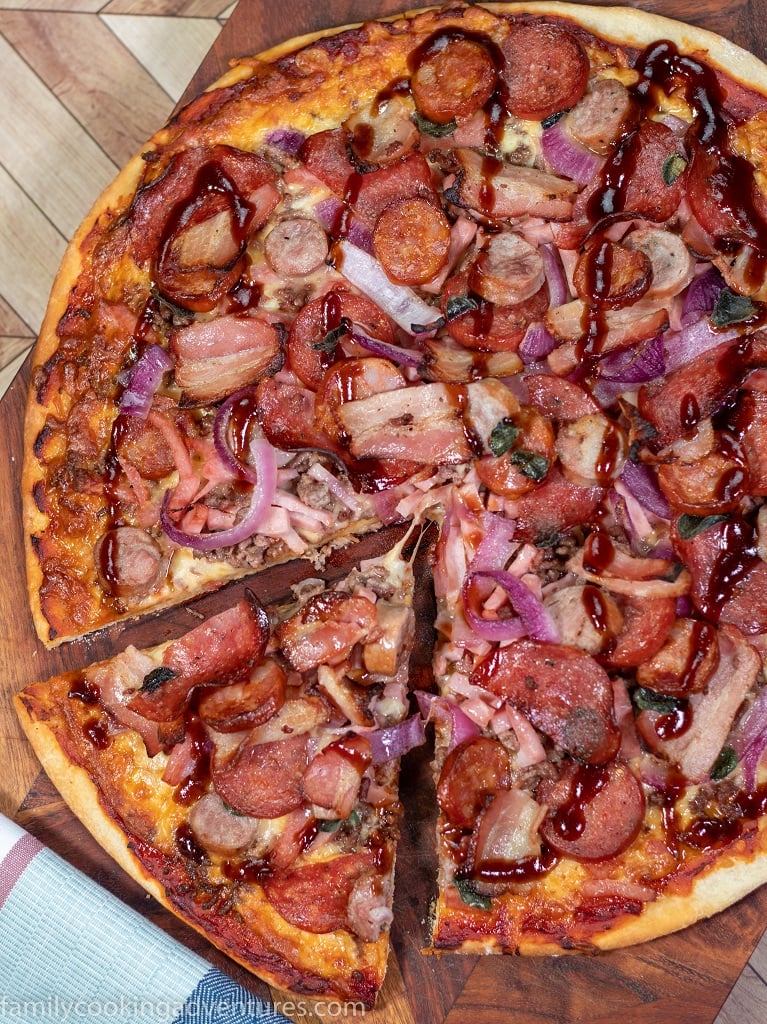
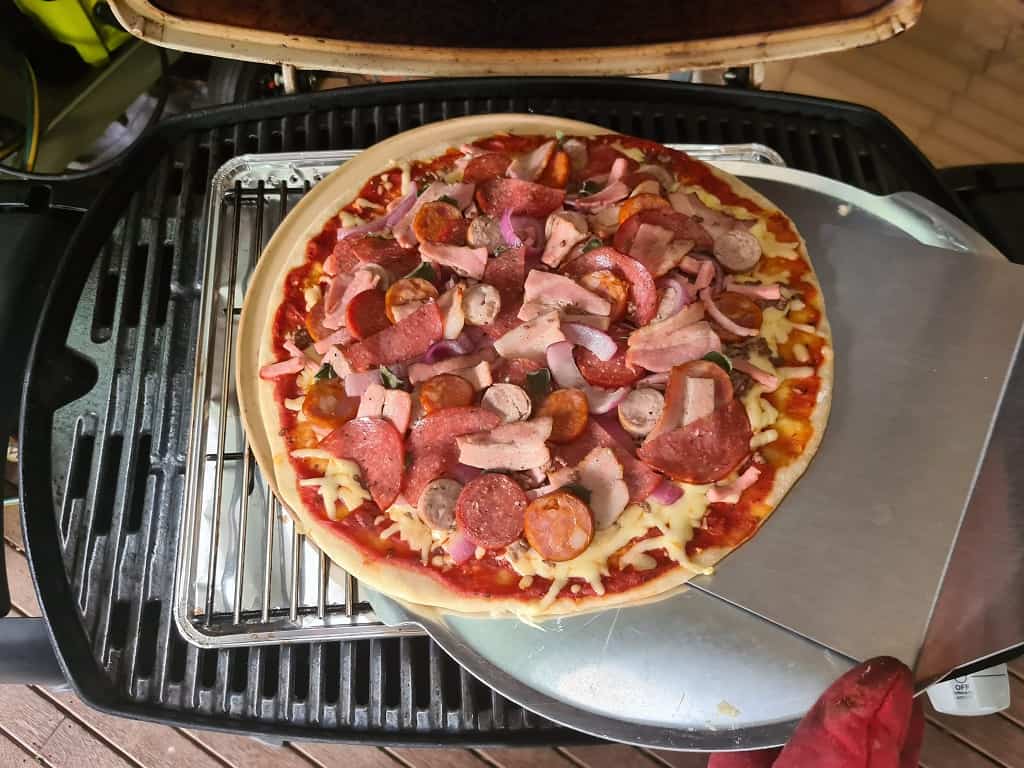
Fully Loaded Meat lover’s Weber Q Pizza Recipe
There is nothing that warms a man’s heart more than a crispy homemade meat lover’s pizza topped with delicious barbecue sauce.
Making your very own Weber Q pizza at home is a fantastic way to also include the kids in your Weber journey.
Kids just love being creative and adding their toppings.
And today, I’m going to teach you how you can make your own meat lover’s pizza on your Weber Q, using my wife’s homemade pizza dough recipe.
By following my recipe, your pizzas will come off your Weber super crispy.
And even better, it’s actually effortless to make on your Weber Q when your camping or at home.
You don’t have to make a meat lover’s pizza, of course. My recipe will work with any of your favorite toppings.
At What Temperature do you Cook a Pizza on a Weber Q?
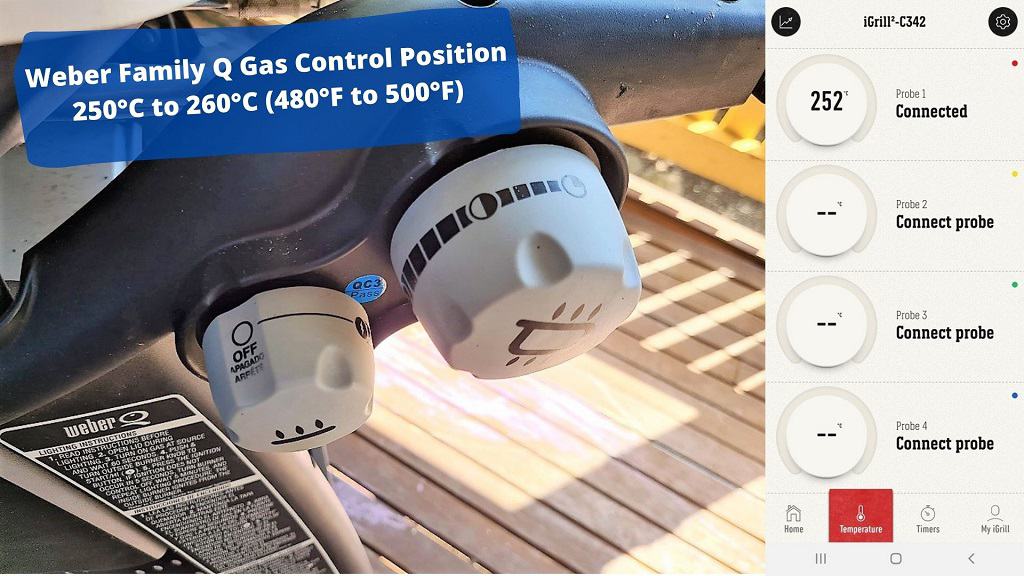
For your Weber Q pizza to turn a lovely crispy golden brown, the temperature should be between 250°C to 260°C (480°F to 500°F) at all times.
You can easily maintain this temperature by adjusting the gas control knob to the middle roasting and medium-high setting as required.
Do I Need to use A Pizza Stone?
Although I would advise you to use a pizza stone, it is not essential.
But if you decide not to use one, it is important to understand that your pizza base will not get enough heat, causing a soft and squishy dough. Nobody wants that!
The ceramic material that makes a pizza stone is designed to draw out moisture and hold and distribute heat evenly across the base.
Using a pizza stone and allowing it to heat up, the pizza dough will get a sudden burst of heat, making the crust puff up.
If you don’t have one in your cupboard, I recommend Weber’s pizza stone.

I personally have been using Weber’s products for years, and they are built to last.
As you can see, my pizza stone has been well used.
Weber has 2 sizes available:
I purchased the 36.5cm Pizza stone, and it fits my Family Q perfectly. There is a catch, though. You can only cook one pizza at a time.
The 26cm is suitable for the Baby Q.
What Goes on a Meat Lover’s Pizza?
This is why the Meat Lover’s pizza is my absolute favorite. It is so universal. You can put literally any meat you want on it.
Get Creative!
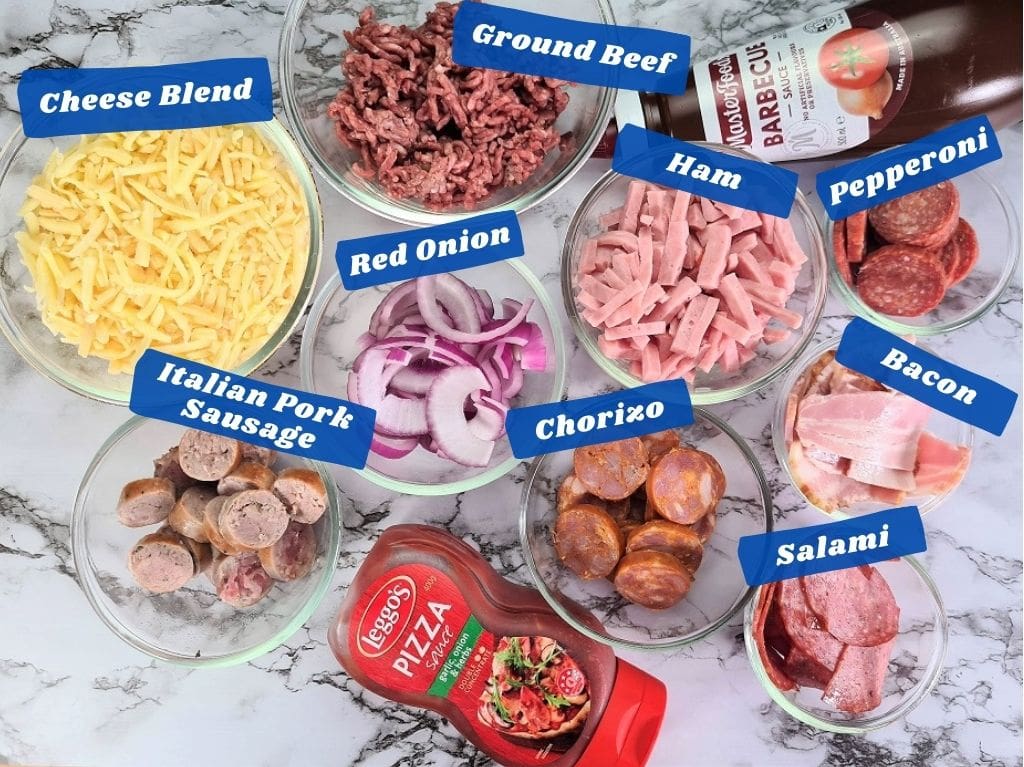
The most commonly used toppings for a Meat Lover’s pizza and the ones I will be using are:
- Ground Beef
- Chorizo
- Pepperoni (Mild)
- Salami (Mild)
- Italian Pork Sausage
- Chopped Ham & Streaky Bacon
- Red Onion
- Combination of Mozerella, cheddar, and parmesan Cheese
Topped with a drizzling of barbecue sauce.
If you prefer your pizza to be hot, add some chili’s, choose a hot pepperoni and salami, and sprinkle on some chili powder.
Maybe you have some leftover roast chicken or lamb from the night before. That also tastes great.
Can you use a store-bought Pizza Base in a Weber Q?
If you want to experience the maximum flavour that cooking in a Weber Q can provide, I would only recommend making your own pizza dough.
Of course, if you struggle to make your own dough, then yes, you can definitely use store-bought pizza bases.
Lebanese bread is a great option and has a beautiful taste and texture.
If your feeling bold and want to have a crack at making your own, we have created a super easy pizza dough that cooks perfectly in your Weber Q.
You should definitely give it a go; you’ll love it!
Pre-Cooking the Toppings
Before assembling our Weber Q Pizza, we will need to do a little bit of pre-cooking.
Chop up a red onion into long strips and slice your streaky bacon into small one-inch squares.
In a frying pan, add your ground beef, bacon, and onion and saute until the ground beef is no longer red. This should only take a minute or two.
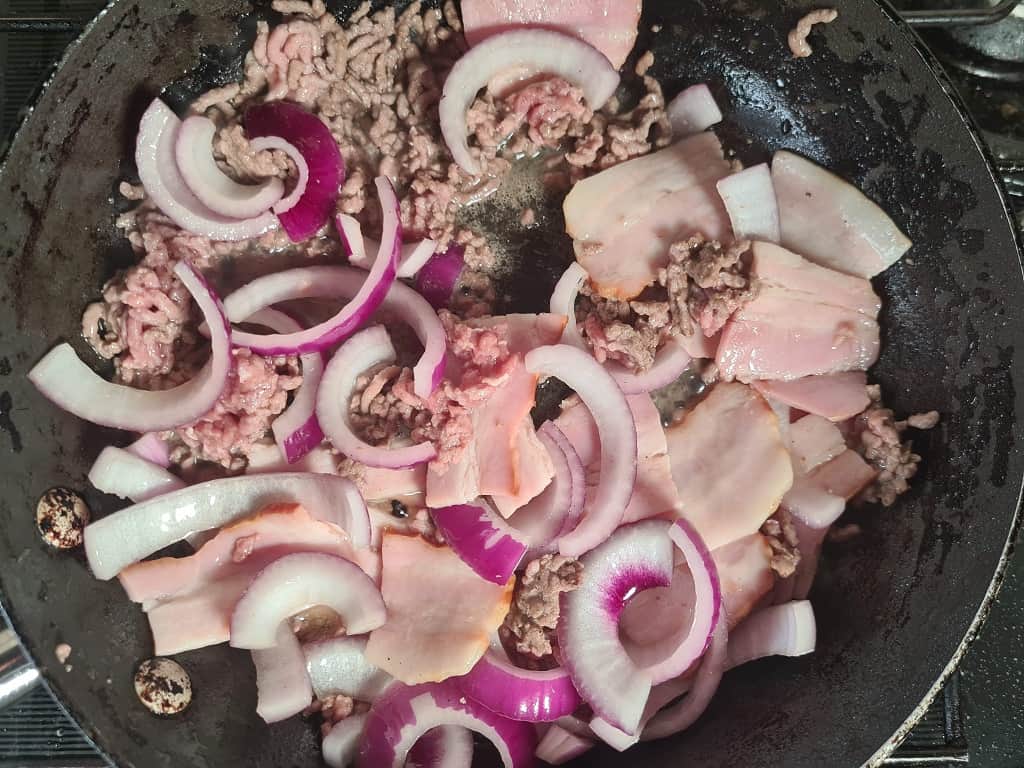
This allows the onion and bacon to caramelize in the beef juices, adding some delicious flavours.
Drain onto some paper towel and pat dry.
Separate your bacon and onion from the ground beef to make placing your toppings easier.
How to Prepare a Meat Lover’s Pizza?
Assuming you have made your own pizza base, I am going to be teaching you this method.
A quick disclaimer:
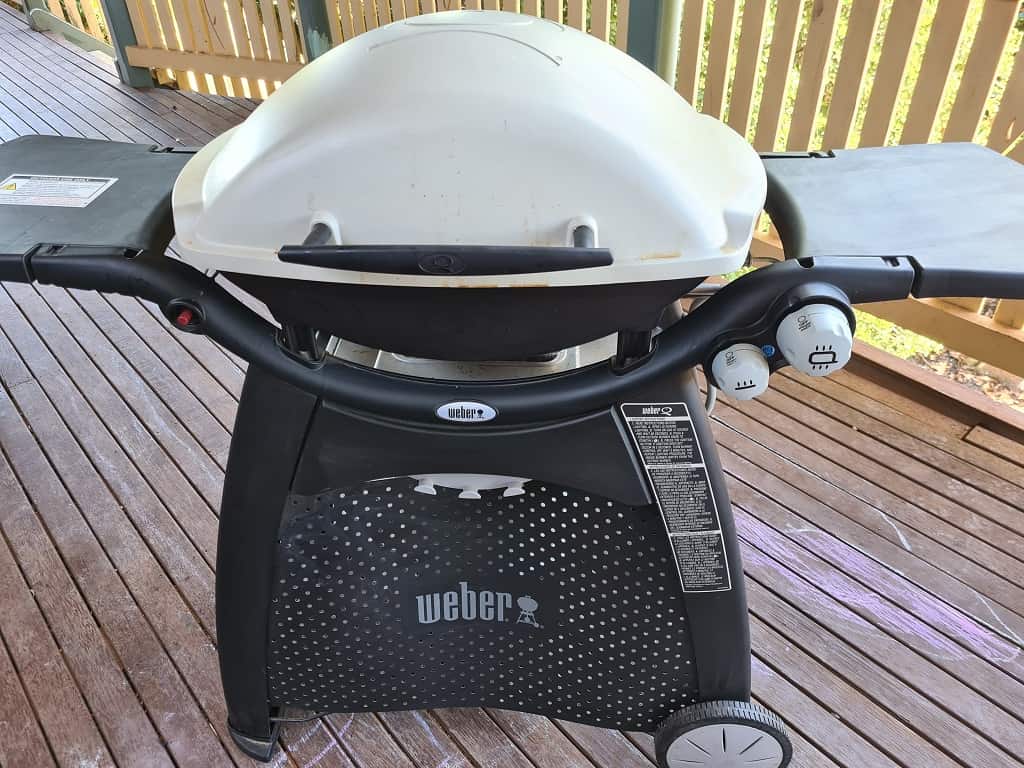
I will be cooking on my Weber Family Q, which has two gas control knobs.
This allows the Family Q to get hotter than the medium and Baby Q series.
As long the Weber Q that you have at home can get up to 250°C to 260°C (480°F to 500°F), your pizza will come out the same way as mine if you follow my simple instructions.
Make sure your grill is nice and clean. You don’t want the odors from a previously cooked meal absorbing into your pizza.
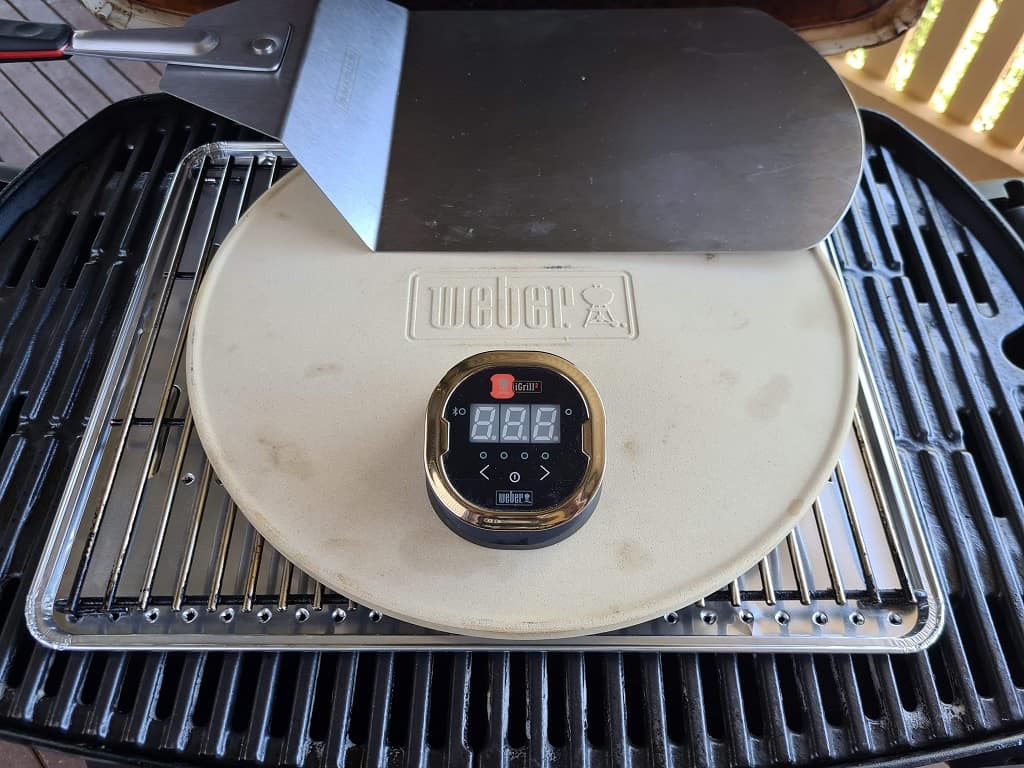
Start by putting a clean convection tray onto your grill and placing your trivet on top of the tray.
Finally, place your pizza stone on top of the trivet.
If you have a thermometer such as an iGrill, place a probe onto your convection tray to help maintain your weber Q temperature easier.
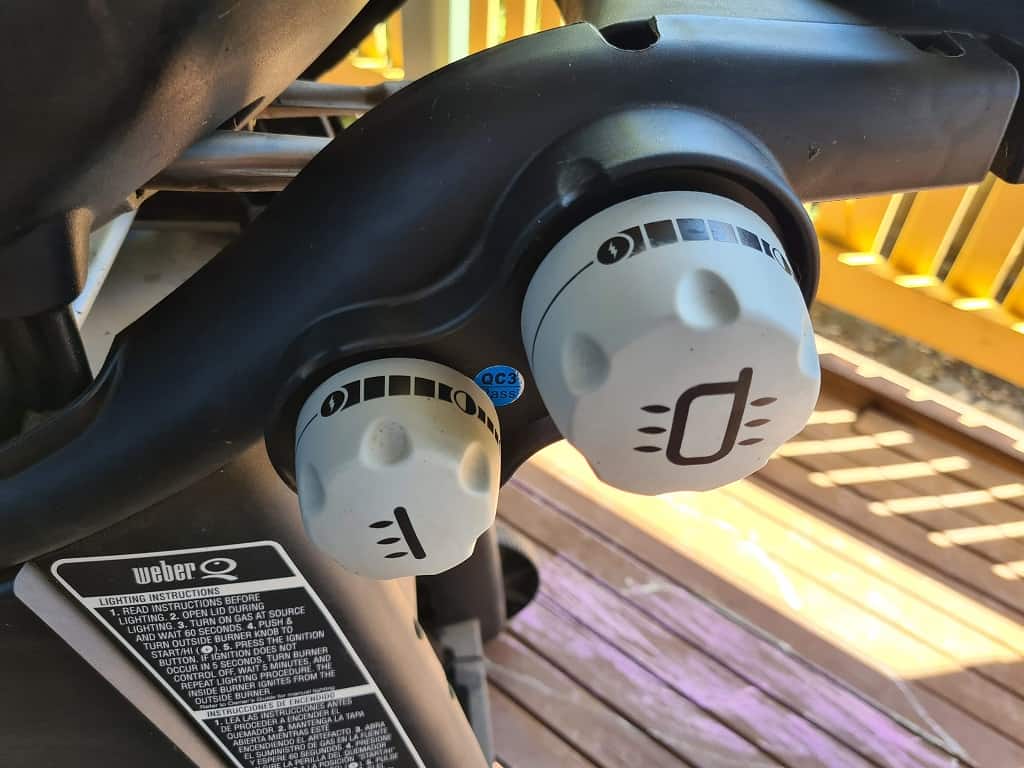
For Family Q, turn both gas control knobs to the Start/Hi position and ignite your bbq.
If you have a Medium or Baby Q turn the single gas control knob to the START/Hi Position.
Close the lid and allow 20 minutes for your pizza stone to heat up.
Meanwhile, use this time to get your pizza prepared.
Sprinkle flour onto a pizza serving tray, so your base doesn’t stick, and your pizza can slide onto your pizza stone easily.
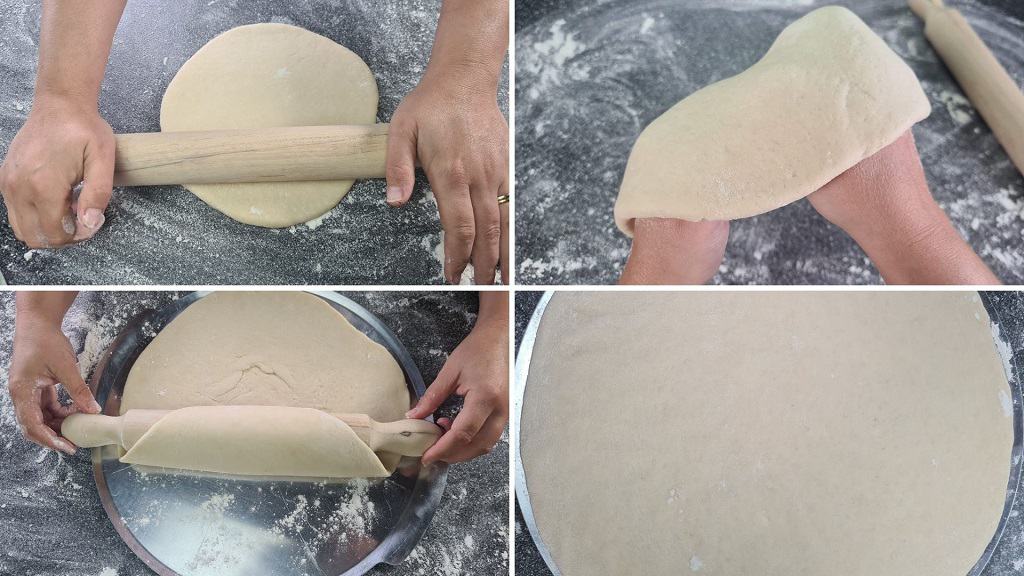
Roll your pizza dough out to the desired to your desired thickness.
Using your knuckles work your dough gently until it expands.
Wrap your dough around your rolling pin and roll it back out onto your pizza serving tray.
And finally using your fingers, work the dough out to the edge of your tray.
Start by spreading your favorite bbq sauce onto your pizza base.
Pop it in the middle and using the back of a spoon, spread your sauce out to the edges.
I’m not a fan of barbecue sauce on my pizza base, so I will be using garlic, onion, and herb sauce instead.
Add your favorite cheese and start placing your toppings, starting with your ground beef.
If you love your oregano, place some fresh leaves around the pizza, to give it that authentic Italian flavor.

How to Cook a Weber Q Pizza?
After 20 minutes, your pizza stone should be nice and hot.
The trick here is to move the pizza as quickly as possible to your Weber Q, so it doesn’t lose a lot of heat.
Lift the lid and place the serving tray onto the pizza stone and close the lid. No Peeking!
For Family Q owners, turn the small gas control knob to the OFF position and the large gas control knob to the medium position until the temperature lowers to around 250°C to 260°C (480°F to 500°F)
For Medium and Baby Q owners, turn the gas control knob down to the medium position to maintain the same temperature.
Adjust the control knob up or down to keep the temperature within this range at all times.
It will have to come off the serving tray and onto the stone to get a crispy pizza base.
And this can be rather challenging to do in the beginning without the pizza collapsing.
But I have a neat little trick. Pre-cook the pizza in the Weber for about 5 minutes, so the dough has set.
This allows the pizza to slide right off the serving tray and onto the stone.
Use a pizza spatula if you have one available, or something large enough that is flat.
Gently lift the pizza and let it slide off your serving tray.
Make sure to lightly flour your pizza stone beforehand.
After your pizza has been cooking for a total of 20-25 minutes, lift the base slightly with a spatula to check if it’s golden brown.
If it’s not, close the lid and raise the temperature if need be for a further 5 minutes.
In Conclusion
I just love making pizzas in my Weber Q.
I love it even more when my kids want to cook with their dad.
We are all so caught up in our busy lives, and we spend less time with our children because of it.
Living in a world where mums and dads work long and gruelling hours means all we want to do is rest after a long day.
It’s our children that suffer.
So the next time your cooking pizza, get your children to help you. They will love it.

Some of our Favorite Weber Q Recipes
I absolutely love experimenting in my Weber Q, and I have achieved some amazing results. So much so that I just have to share some of them with you.
- Super Juicy Roast Pork with Crackling
- Tender Roast Leg of Lamb with Garlic and Rosemary
- Honey Glazed Roast Chicken
- Super Crunchy Weber Q Roast Potatoes
My wife has even had a crack at baking in our Weber Q. You have got to check out her Banana and Walnut Bread recipe.
Fully Loaded Meat lover’s Weber Q Pizza

Equipment
- Weber Q
- Convection Tray
- Trivet
- LPG Gas
Ingredients
- 150 g Ground Beef
- 250 g Pizza Blend Cheese
- 150 g Ham
- 70 g Chorizo
- 70 g Pepperoni Mild or Hot
- 80 g Bacon
- 50 g Hungarian Salami Mild or Hot
- 70 g Italian Pork Sausage
- 1 Red Onion Sliced Long
- Fresh Oregano Leaves
Instructions
Starting up your Weber Q
- Add a new convection tray to the center of your weber and place your trivet on top. Finally, place your pizza stone on top of your trivet.If you have an iGrill 2 thermometer rest the probe onto your convection tray.
- For Family Q owners, turn both gas control knobs to the START/Hi position and ignite your weber.For Medium and Baby Q owners, turn the gas control knob to START/HI position.
- Close the lid and leave your Weber Q to heat up your pizza stone for 20 minutes.
Preparing your Meat Lover's pizza (Using Homemade Pizza Dough)
- Sprinkle flour onto your bench. Use a rolling pin to roll out your pizza base until you get the desired thickness.
- Using your fists, gently turn and push your knuckles outwards to spread your pizza dough.
- Lay your dough out flat and roll your dough onto your rolling pin. Sprinkle more flour onto a pizza serving tray. and roll it back out. Gently push the edges out to fill the serving tray.
- Using the back of a dessert spoon spread barbecue or tomato paste onto the pizza base, starting from the middle in circle motions until covered in pizza sauce.
- Sprinkle cheese, ground beef, onion, and ham followed by all of your chosen toppings.
Cooking your Meat Lover's Pizza
- The pizza is heavy and won't slide onto the pizza stone. Place the serving tray directly onto the pizza stone, close the lid, and cook for 5 minutes on the high setting.
- Family Q owners, turn the small has control knob to the off position and leave the large gas control knob on high to quickly strengthen the pizza dough and make it easier to move to the pizza stone.Medium and Baby Q owners, leave the gas control knob on high.
- After 5 minutes lift the lid and check if the pizza dough is strong enough to move to the pizza stone without splitting. Use a large flat tool such as a pizza spatula to gently lift and push the pizza onto the stone.
- Close the lid and turn the gas control knob to the medium/middle setting. This is for both Family Q, Medium, and Baby Q.
- Maintain a temperature between 250°C to 260°C (480°F to 500°F) at all times by adjusting the gas control knob between medium to medium high.
- Cook for 20 minutes or until crust is golden brown on the edges and underneath the pizza. Try to avoid lifting the lid of the weber to keep the heat inside.
- When the pizza is cooked, gently lift and push the pizza back onto the pizza serving tray, turn off the gas control knob/s, and shut off the LPG gas bottle.
- Allow to cool for 5 minutes, slice into 8 pieces, and serve.


Hi, I love your weber recipes! You go into great detail and best of all, you suggest the best temperatures. to cook. When it comes to cooking on the weber, I have to follow recipes to the letter so your detailed explanations are a great help. I often visit your site to see if you have added additional weber recipes for me to try. Oh, I cook with the baby weber…
Stay tuned for many more recipes. Also, I have plans to bring Weber Kettle recipes to JustSOYum in the near future. Thank you so much for your feedback.