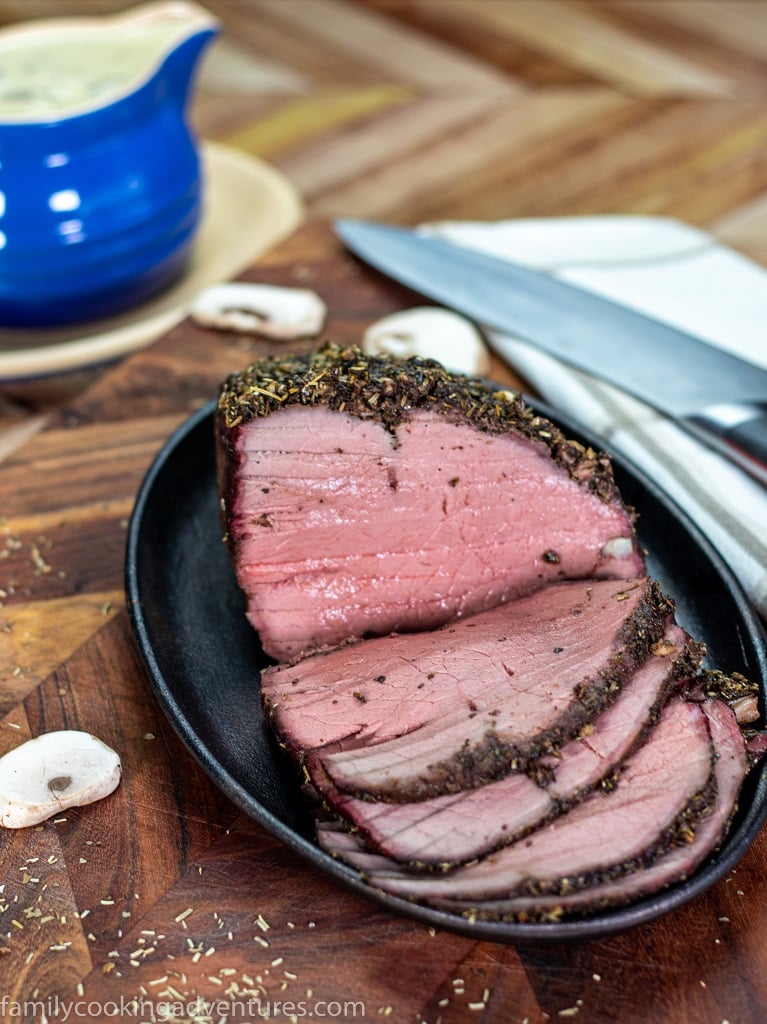
Garlic Herb-Crusted Weber Q Roast Beef
I’ve spent countless hours scouring the internet for tips and tricks on Weber Q roast beef, specifically focusing on low and slow cooking methods. To my surprise, I found a distinct lack of detailed information for achieving the perfect Weber Q roast beef.
So, for this one, I went rogue and ventured into uncharted territory. And let me tell you, the results were nothing short of spectacular!
You won’t be disappointed. Why? Because I’ve cracked the code and unlocked the secrets of maintaining temperatures below 120°C (250°F) for extended periods, something many thought impossible.
I won’t lie to you when I say there is a little mucking around to set the Weber up for low and slow cooking, but by learning my technique, you can slow cook just about anything.
Can a Weber Q Be Used for Slow Cooking?
The short answer is yes; slow cooking in a Weber Q can be done. And the meat actually comes out really tender and juicy.
But how?
It is widely discussed in various forums across the internet that you cannot slow cook in a Weber Q.
The Webers Q’s intended purpose was always to cook under higher intense temperatures than your conventional Weber Kettle.
This is simply not true.
Firstly I must admit, I was also under the impression that it can’t be done either.
But I don’t believe rumors until I try it out for myself. Now admittedly, I did get it wrong the first time.
My first attempt was using a blade roast which was just way too tough to eat.
This was because I couldn’t get the temperature low enough to let the roast cook slower, tenderizing the meat over a long period.
It cooked way too fast.
My second attempt was perfect in every way because of two reasons.
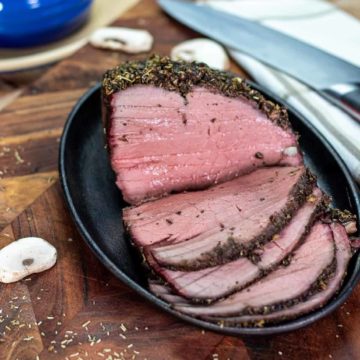
I reduced and held the Weber Family Q temperature under 120°C (250°F) for just over 4 hours with a 1kg topside roast beef.
And cooked to the perfect medium 60c (140°F) doneness.
The second reason was the cut of beef that I used; topside is commonly used for low and slow cooking in a slow cooker.
Setting Up Your Weber Q for Low and Slow Cooking
I know I said there was a bit of mucking around earlier, but it’s really not that hard.
Before I continue, I have a short disclaimer.
I have only tried this method in my family Q.
But I assume if you have the Medium or Baby Q, this method should be similar for you guys also.
What matters is that you can keep the temperature under 120c (250°F) to nail a perfect Weber Q roast beef every time.
I would love to read in the comments if you guys had success with my method and help others.
Prepare your Weber like you would when cooking any roast.
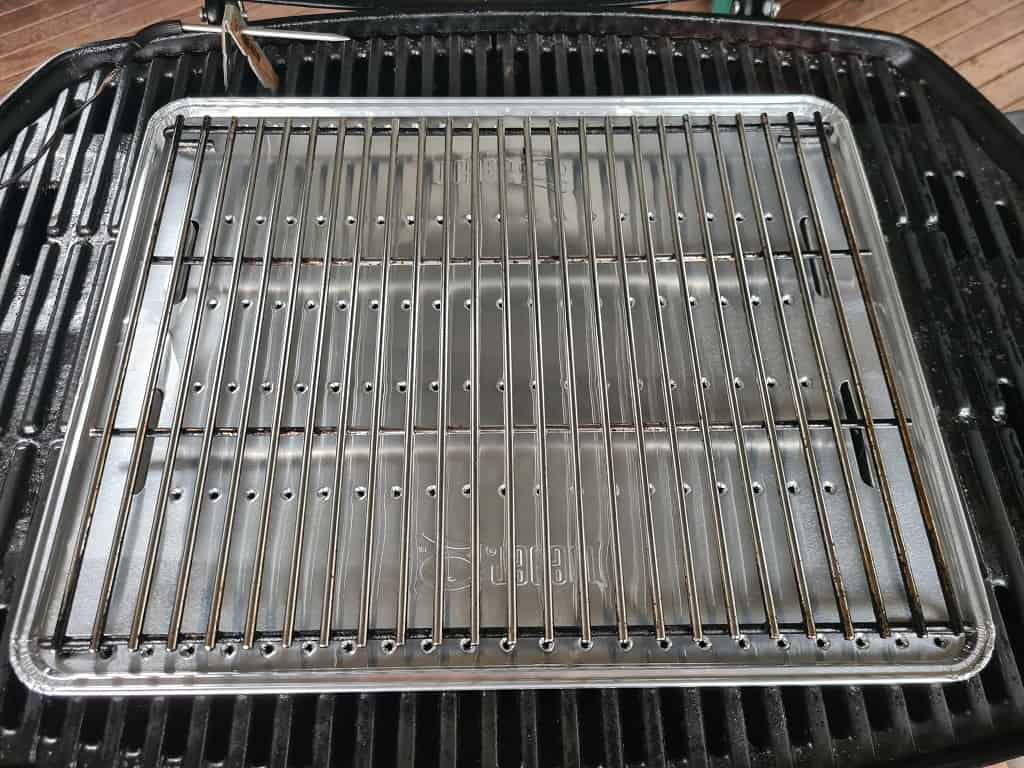
We want the indirect cooking method here by placing your convection tray and trivet onto your Weber.
Now it’s going to get a little weird, lol.
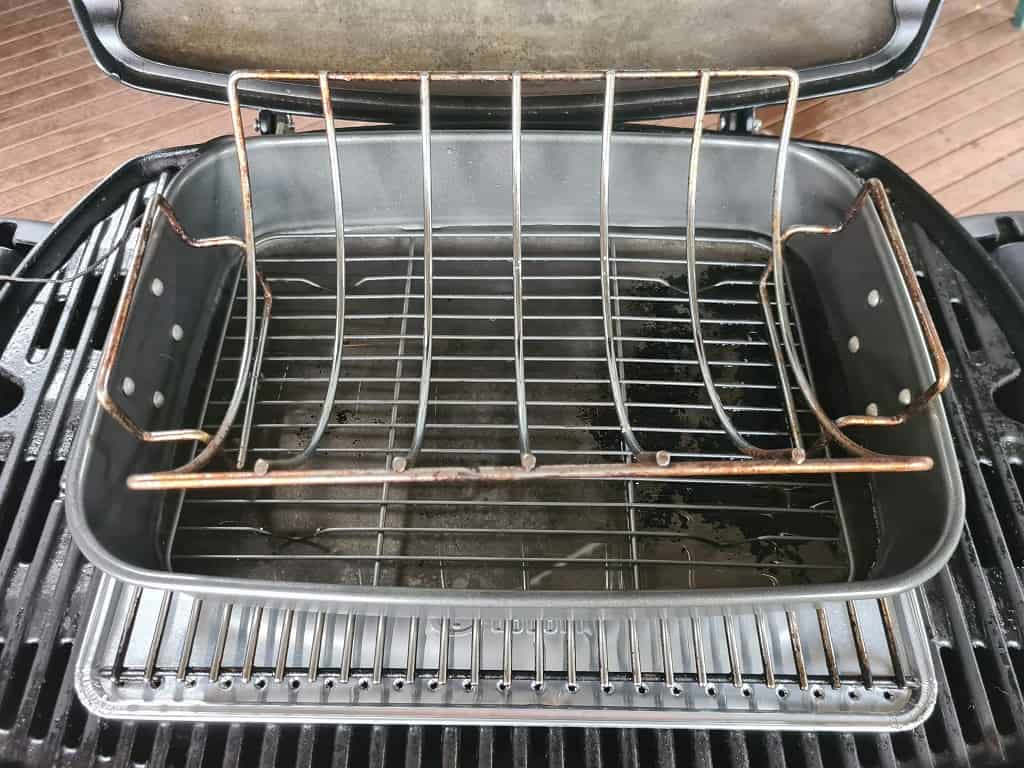
You’re going to need a roasting pan and rack that will fit into whichever size Weber Q you’re using so you can close the lid fully.
The beef needs to be lifted so it won’t touch the water. A great idea is to place a roasting rack inside the roasting pan.
I purchased mine from bunnings for just under $13, and it fits in my roasting pan great.
You can check the same roasting rack I use here.
You’re also going to need a kettle and an Inkbird instant-read wireless meat thermometer or something similar to monitor your meat and Weber Q temperature at all times.
Begin by turning your gas bottle on so it is open just enough to light.
We need to starve your Weber of Gas. This will contribute to keeping the temperature under 120C.
Family Q owners need to use the small gas control knob only.
Medium and Baby Q owners just keep the gas control knob to the lowest setting.
While your Weber is heating up, fill and boil your kettle and pour the water into your roasting pan until it reaches the bottom of the rack.
Place the tray into the center of your trivet and close the lid until your ready to begin cooking your Weber Q Roast Beef.
Preparing your Weber Q roast beef
The reasoning behind using a top side as my leading choice to roast in my Weber Q is because it’s such a lean cut.
Coming from the top end of the cow’s rear and an excellent choice for slow cooking.
The meat will break down over long periods making the meat beautifully moist and tender.
Topside also slices nicely and won’t fall apart after it’s rested.
And lastly, it’s a very inexpensive cut making it quite a thrifty roast when cooking for larger families.
For the Aussies out there, my 1.04Kg topside came in at $20 at my local butcher’s.
Firstly it’s vital to allow at least 1-2 hours for your roast beef to come up to room temperature.
This will give the beef more of an even cook.
All of the beef from the middle to the outside should look like your desired doneness.
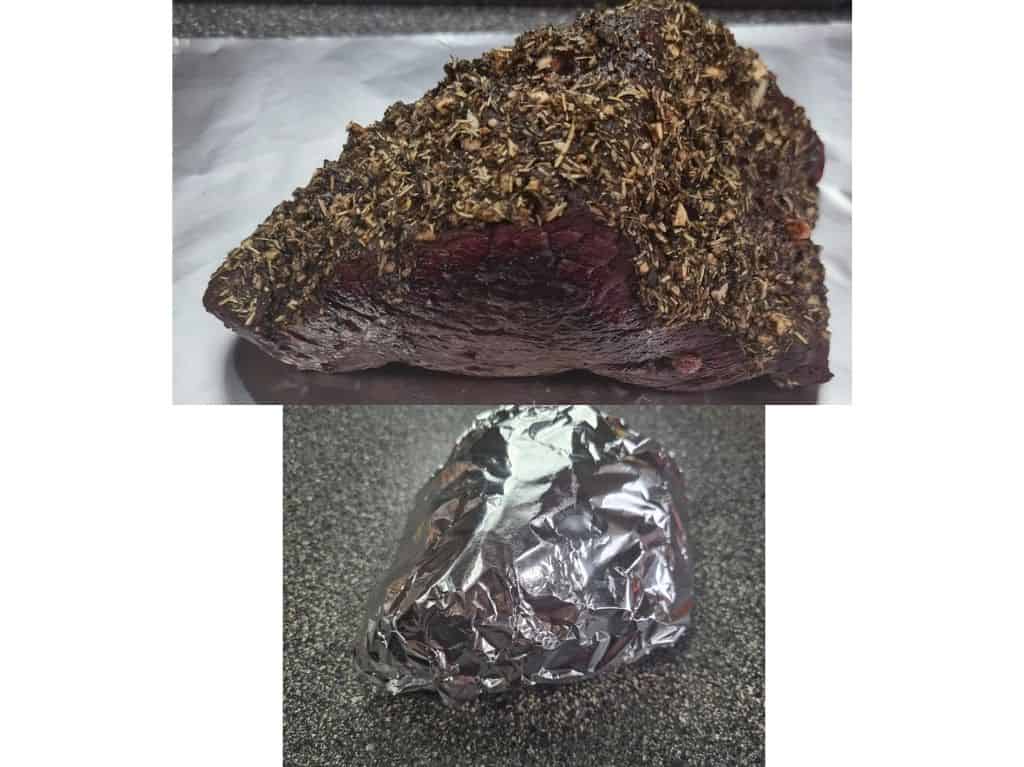
To begin, we are going to want to season our beef. To create the crust, I have used a combination of herbs:
Make shallow cuts about an inch apart over the top of the topside.
Cut the garlic into slivers and make small incisions into the topside without cutting too deeply.
The garlic only needs to be placed near the surface of the topside.
Do this around the top and the sides, placing a sliver of garlic into each incision.
I only used fresh garlic in this recipe, but you are most welcome to use all fresh herbs.
I can get a little lazy when it comes to using fresh herbs, but I’m not negotiable when it comes to garlic…lol.
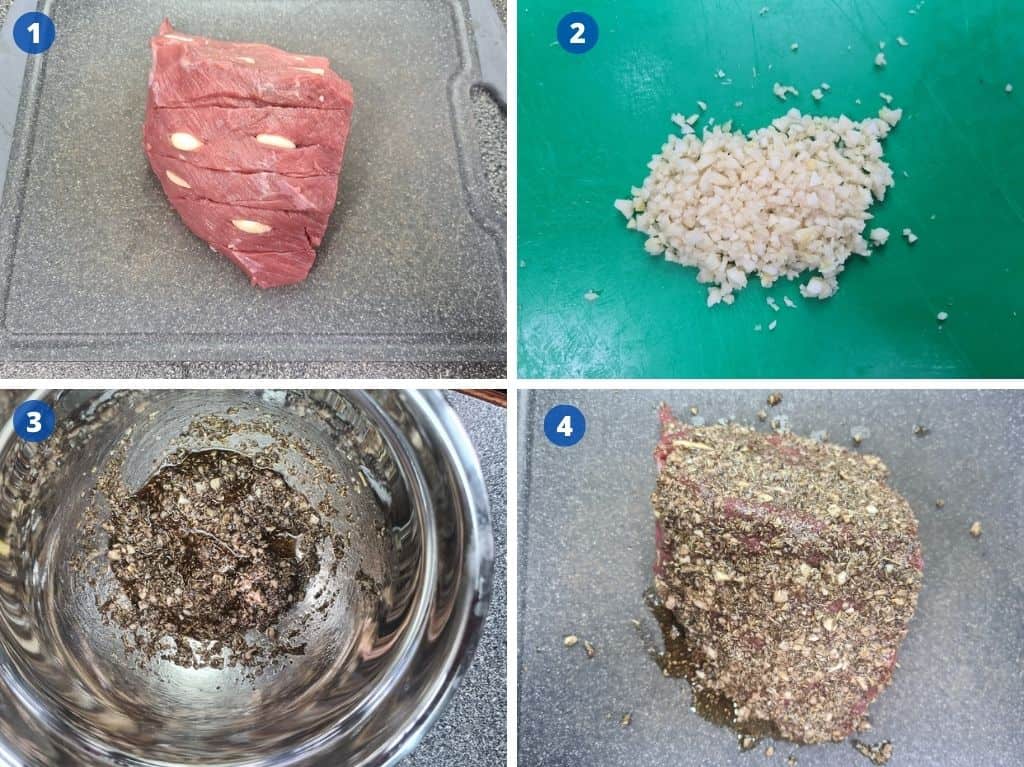
Dice 6 garlic cloves so they are really fine. You don’t want a large chunk of garlic getting into your mouth, yuck.
A food processor works really well if you hate dicing. And if all of the herbs you have used are fresh and not dry.
Combine the olive oil and herbs into a mixing bowl and stir well.
Start by covering the herb mixture over the topside—There’s no need to worry about the bottom.
Push the mixture into the slices you made earlier that are 1 inch apart.
Now, your roast beef is ready for slow cooking.
How Long Does it Take to Cook a Roast Beef in a Weber Q?
It’s essential to keep in mind the weight and thickness of your chosen cut of beef.
It is also essential to keep in mind your desired doneness.
Weber has a USDA safe minimum eating guide for beef, which you may find quite helpful.
I put my 1kg topside into my Weber Q at 1 pm. By 5 pm, it had reached an internal temperature of 60C (140°F), keeping within a cooking range of 107°C (224°F) to 118°C (244°F) at all times.
So I hope this will help you determine your cooking time and choice of doneness.
Get your Weber Q roast beef into your Weber
Double-check that your Weber is within a range of 107°C to 120°C.
Putting your beef into your Weber needs to be done quickly; we don’t want to lose too much heat.
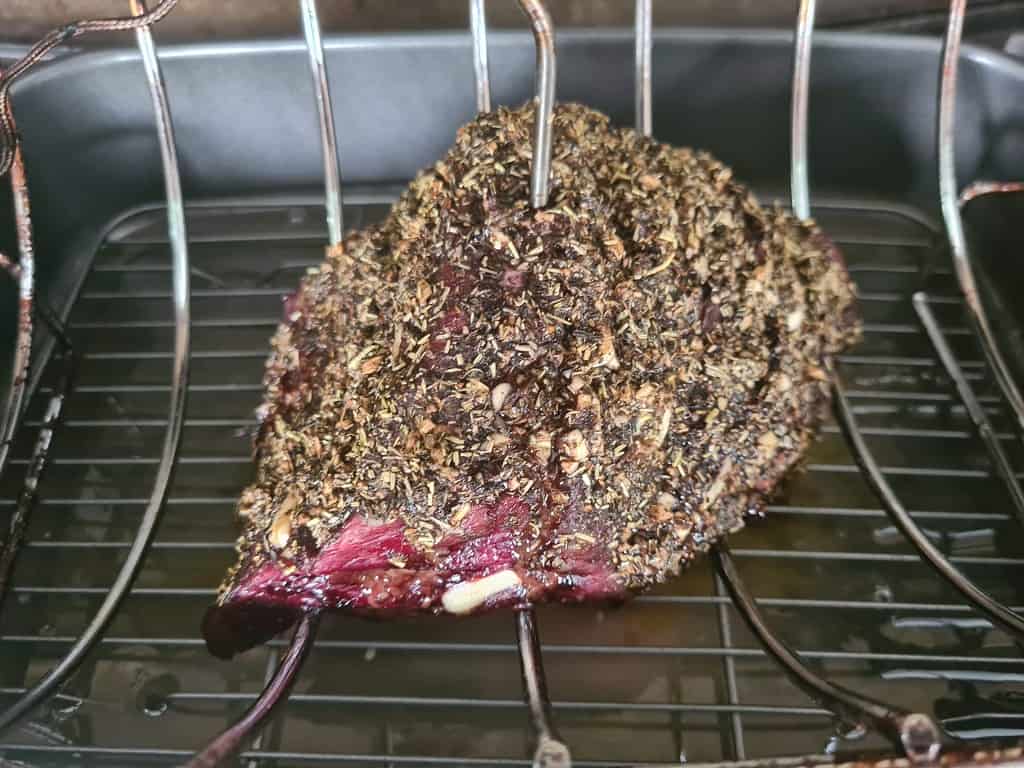
Place your roast beef onto the roasting rack, insert a meat probe into the beef’s top centre, and push down about halfway.
Close the lid of your Weber Q and try not to do a lot of peaking throughout the cook.
I cannot stress enough how important it is not to lose any heat.
If you have an instant-read wireless meat thermometer, set up a new cook through the app to alert you when the Weber Q’s temp falls outside 107C and 120C.
Set up another alert for your desired doneness on the second probe.
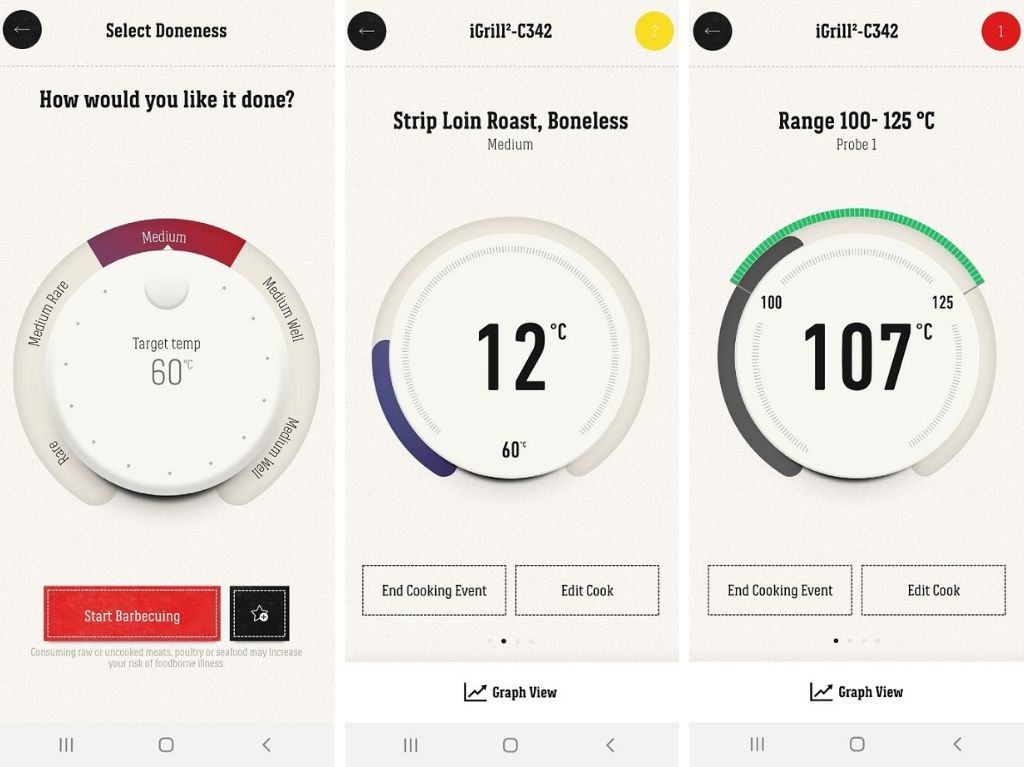
ProTip: Being an American App, Topside was not there; just enter any cut. It doesn’t matter, as everything is entered manually. You can now make the necessary adjustments without ever needing to lift the lid on your Weber Q.
How Long Do You Rest Roast Beef For?
This is up for debate! Keep in mind that you are cooking in a Weber Q. The Rules are different because of your cooking style.
It’s said that resting time for any meat that has been slow-cooked doesn’t need a lot of rest time. I beg to differ.
Although I am not getting into that.
I can only speak from personal experience, and you just want to know how and how long to rest, right?
This is what I did, and it worked out just fine.
Once the roast beef is ready, immediately place it on aluminium foil and wrap it up tightly.
I used two layers of foil to ensure no heat would escape, and I let it rest for 40-45 minutes.
This method works for me, and I hope it works out for you guys, too.
Please drop a comment below if you tried my garlic herb-crusted Weber Q roast beef recipe. I would love to hear how it went for you.
Other Weber Q Recipes We Love!
Our list of recipes is growing rapidly on Family Cooking Adventures, and so is their popularity.
Please take the time to check out some of our other Weber Q recipes; they are perfect for special occasions or a simple Sunday roast.
- Rosemary and garlic Weber Q roast lamb
- Weber Q Roast pork with Crackling
- Honey and herbed Weber Q roast chicken
We have even baked in our Weber Q.
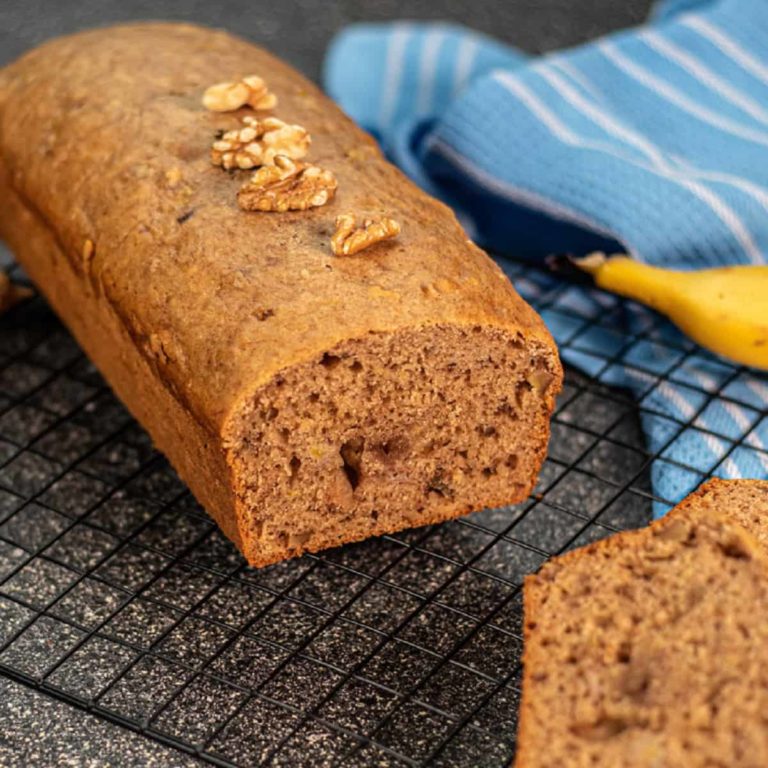
And another family camping favourite is our banana and walnut bread.
Lastly, you just have to try my fully loaded meat lovers recipe, which has been entirely homemade.
Everything is entirely homemade, right down to my partner’s Weber Q pizza dough recipe.
Combine the two for a mouth-watering experience.
We’re an affiliate
We hope you love the products we recommend! Just so you know, we may collect a share of sales or other compensation from the links on this page. Thank you if you use our links, we really appreciate it!
Garlic Herb-Crusted Weber Q Roast Beef
Equipment
Ingredients
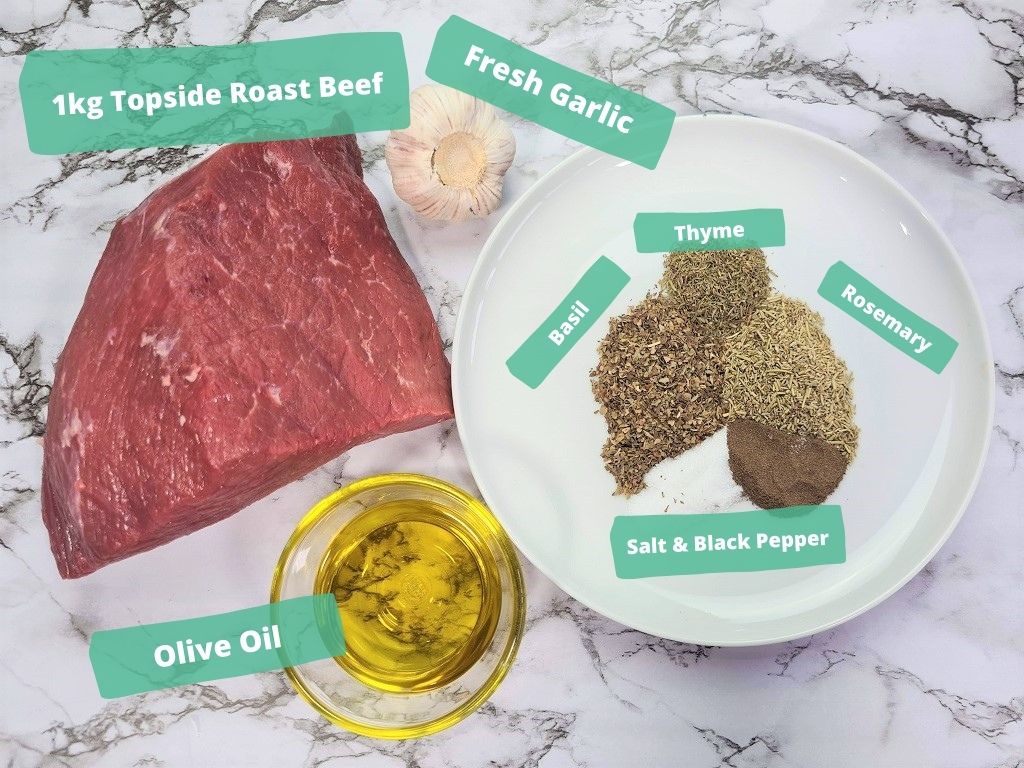
- 1 kg topside beef trim any fat
- 6 cloves garlic diced
- 4 cloves garlic sliced into slivers
- 1 tbsp basil
- 1 tbsp rosemary fresh or dried
- 1 tsp thyme fresh or dried
- 1 tsp salt
- 1 tsp black pepper
- 1/4 cup olive oil
Instructions
Prepping the Beef
- Allow 1-2 hours for the beef to come up to room temperature before starting.
- Make slices one inch apart from end to end to allow the herb mixture to be absorbed by the beef.
- Cut shallow slits evenly around the beef and place a sliver of garlic into each slit.
- In a small mixing bowl add olive oil and combine with, diced garlic, basil, rosemary, thyme, salt, black pepper, and mix thoroughly.
- Rub mixture evenly around the top and sides of the meat making sure to get it into the slices you made earlier, and set aside.
Starting the Weber Q
- Place a rack inside a roasting pan and fill it with water until it reaches the bottom of the rack. Then place a roasting rack inside the pan.
- Turn the gas on your Weber Q so it's open enough to light. Family Q users leave the large gas control knob off and turn the small gas control knob to the low position and ignite the Weber Q.
- Medium and Baby Q owners turn the gas control knob to the low position and ignite.
- Place a clean convection tray and trivet onto the grill, followed by the roasting pan with rack onto the trivet and close the lid. Allow approximatally 20 minutes for the Weber to reach the correct temperature.
- Once the temperature of the Weber Q has reached 110°C (230°F) place the roast beef onto the roasting rack and place a meat probe into the top center of the beef pushing it down halfway, and close the lid.
- Monitor temperatures of both the Weber Q and roast beef making sure it stays between 107°C (225°F) and 120°C (250°F) at all times. Make any necessary adjustments to maintain this temperature at all times.
- Once the internal temperature has reached 60°C (140°F) internally for medium or 63°C (145°F) medium-well done, the roast beef can be removed from the Weber Q.
Resting Time
- Wrap the roast beef in two layers of aluminum foil and allow to rest for 40-45 minutes before carving and serve with your favorite gravy.
Notes
- If you just happen to have any leftovers wrap any slices into aluminum foil and place them in the fridge. The leftovers make for great steak sandwiches later.
- Leftovers will last in the fridge for 2-3 days as long as the beef is not overcooked (well-done) and can be enjoyed as a cold cut.
- If you want to re-heat for later, keep the beef wrapped in foil and place in a pre-heated oven at 120°C (250°F) Once the oven reaches temperature turn the oven off and allow the beef to sit there inside the foil for 10-15 minutes.
- Combine your Weber Q roast beef with homemade mushroom gravy and you’ll be in for a real treat.