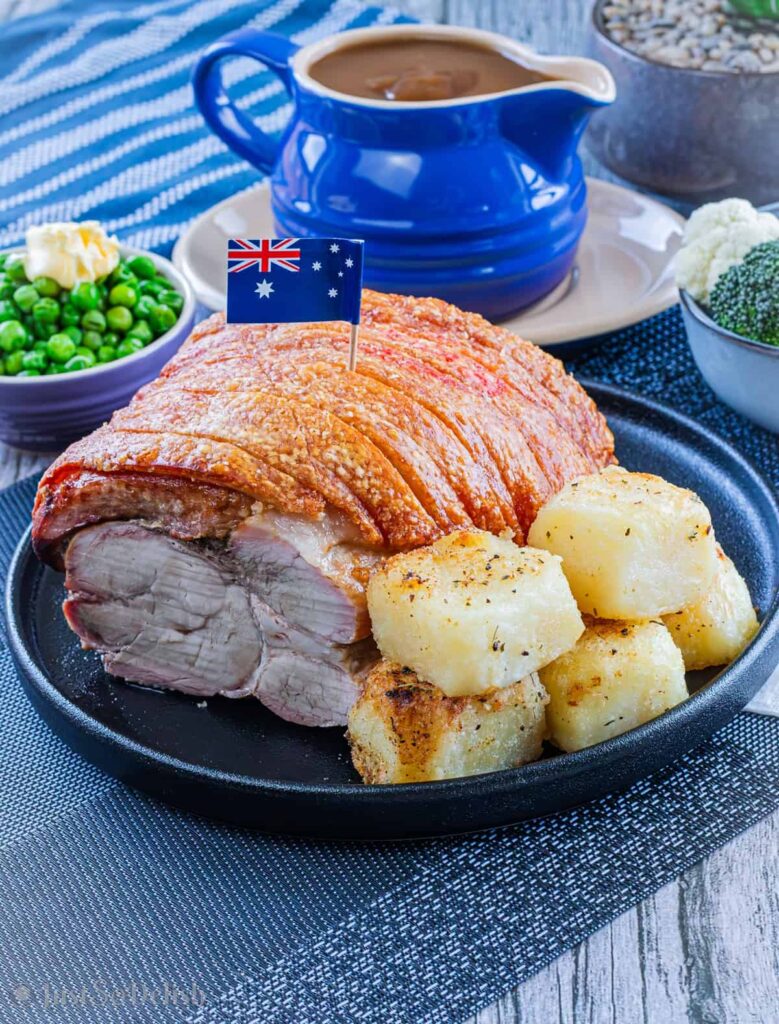
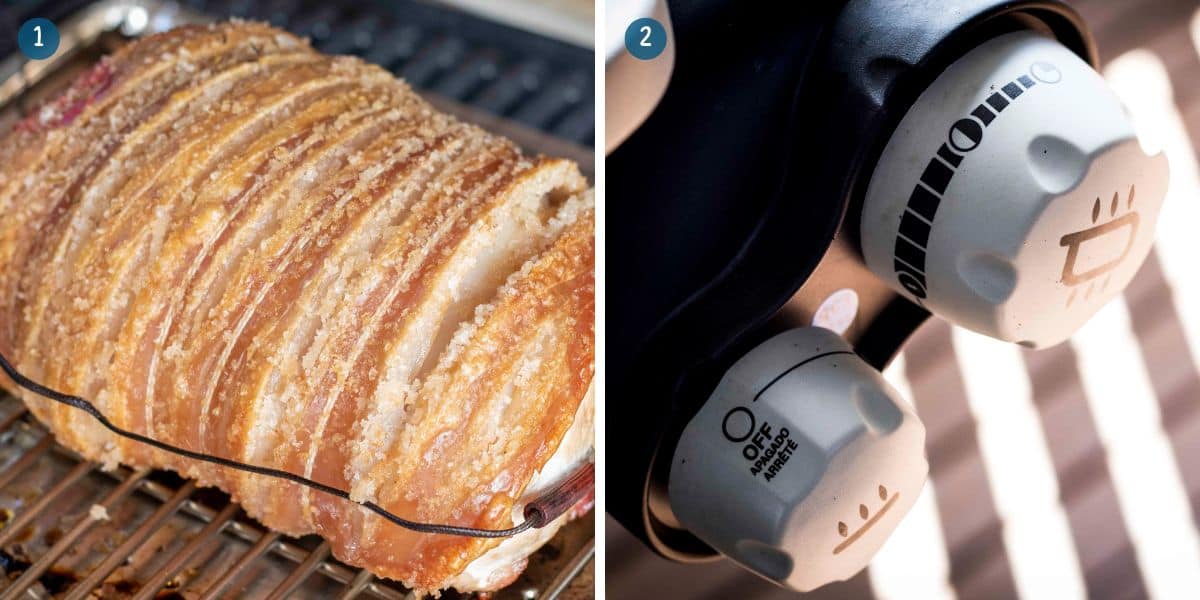
Ultimate Weber Q Roast Pork with Crackling
Dive into a world of mouthwatering flavours with our Weber Q roast pork! Think succulent, juicy pork beneath a golden, crispy crackling. New to Weber Q? Don’t worry! This simple yet delicious recipe will have you crafting the perfect roast pork in no time.
Why you’ll love the Weber Q roast pork
- Crackle Nirvana: You won’t believe the crackling I get on my Weber Q! Forget that rubbery stuff. This is golden, crispy perfection. Every bite cracks, shatters, and explodes with juicy pork flavour. Imagine the look on everyone’s face when you bring out this roast pork.
- Juicy Feast Every Time: The Weber Q keeps all the juices locked in, making every bite of roast pork super tender and delicious.
- Effortless Weekend Win: The Weber Q makes roast pork a breeze! Score the meat, season it, throw it on the grill, and relax. Restaurant-quality pork with barely any effort—the grill does the work, and you enjoy the fun!
- Crispy Crackling, even from Vacuum-Sealed Pork: Just rub the skin with salt and leave it uncovered in the fridge overnight. The fridge dries it out perfectly, and then your Weber Q works its magic!
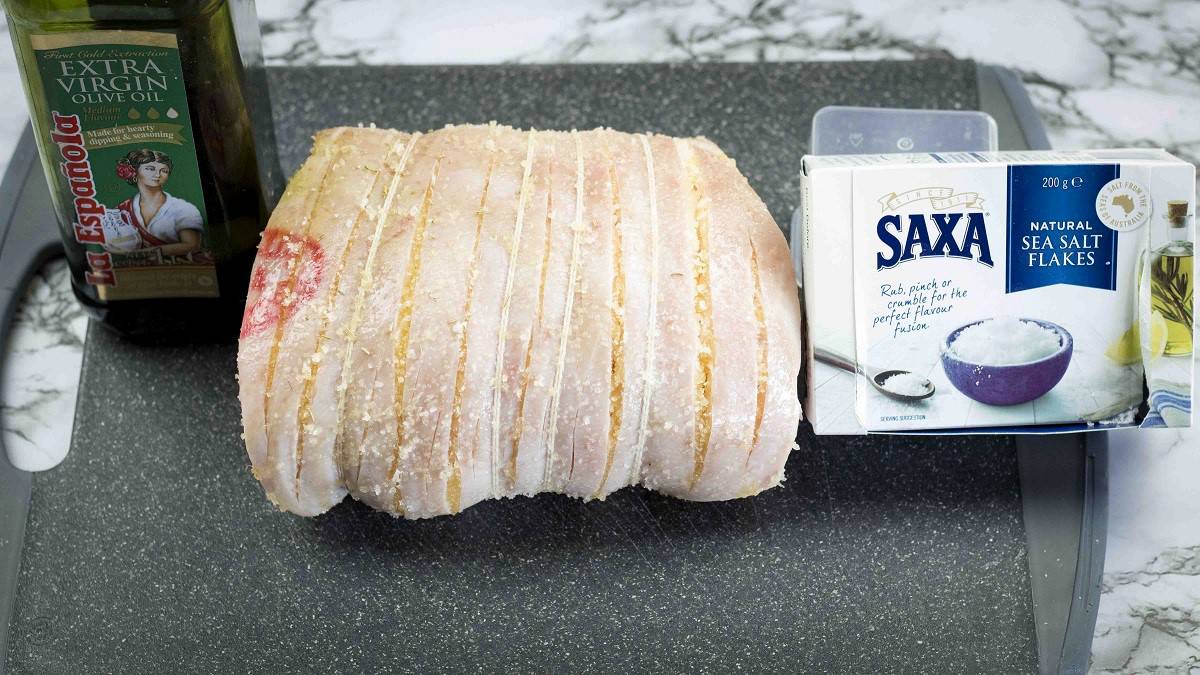
Ingredients to make Weber Q Roast Pork
With this straightforward guide and three ingredients, you’re all set to create a crackling masterpiece. Even with vacuum-sealed pork, this trick is an absolute game-changer.
The ingredients you’ll need are:
How to make Weber Q roast pork?
Is the skin bone dry? First, take a sharp knife and score the pork skin, keeping about a 2-centimetre gap between each line. Don’t cut into the flesh underneath—it’s all about the skin here.
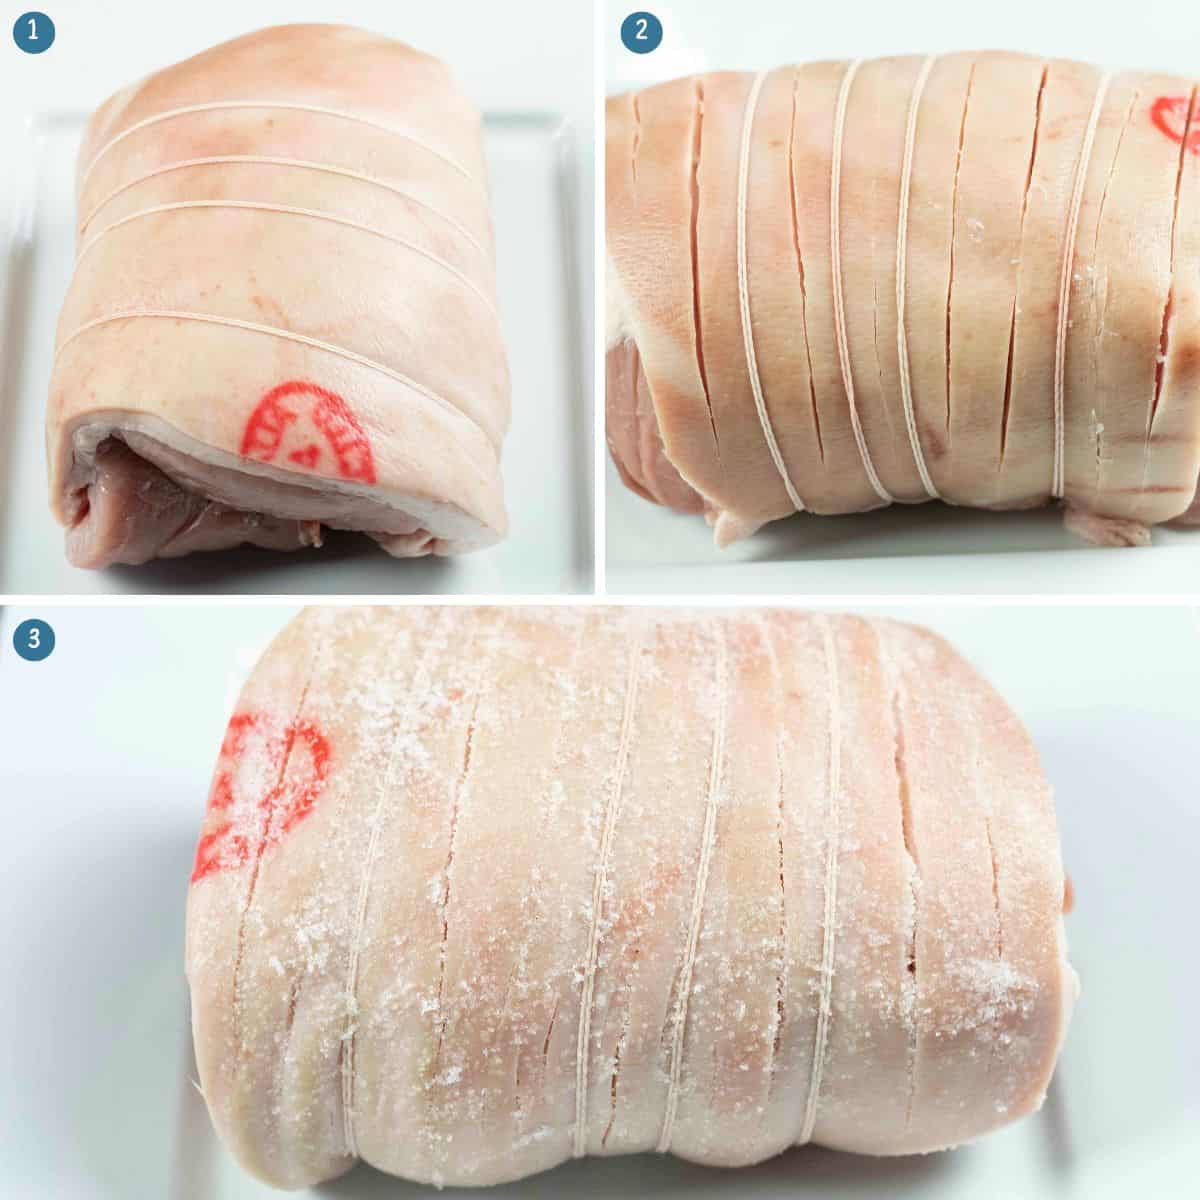
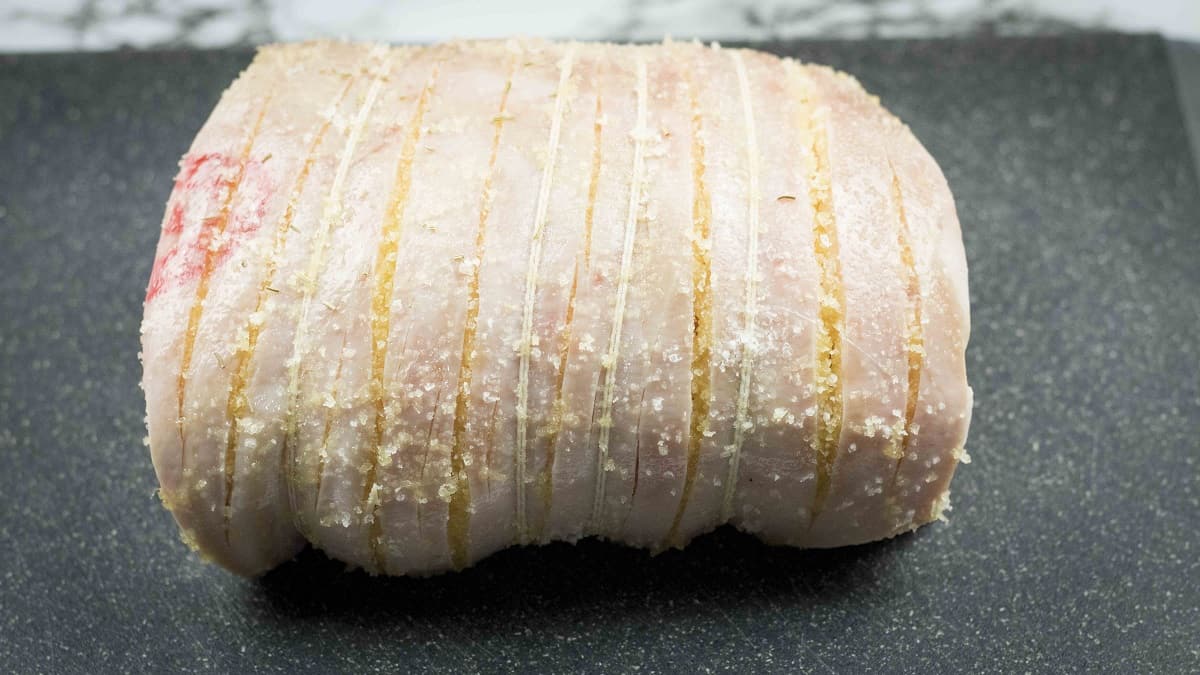
Splash extra virgin olive oil all over the skin, and don’t forget the bottom and sides of the pork.
Now comes the fun part: the salt. Sprinkle a generous amount of granulated salt or salt flakes all over the skin, including the score marks.
Fire up your Weber Q
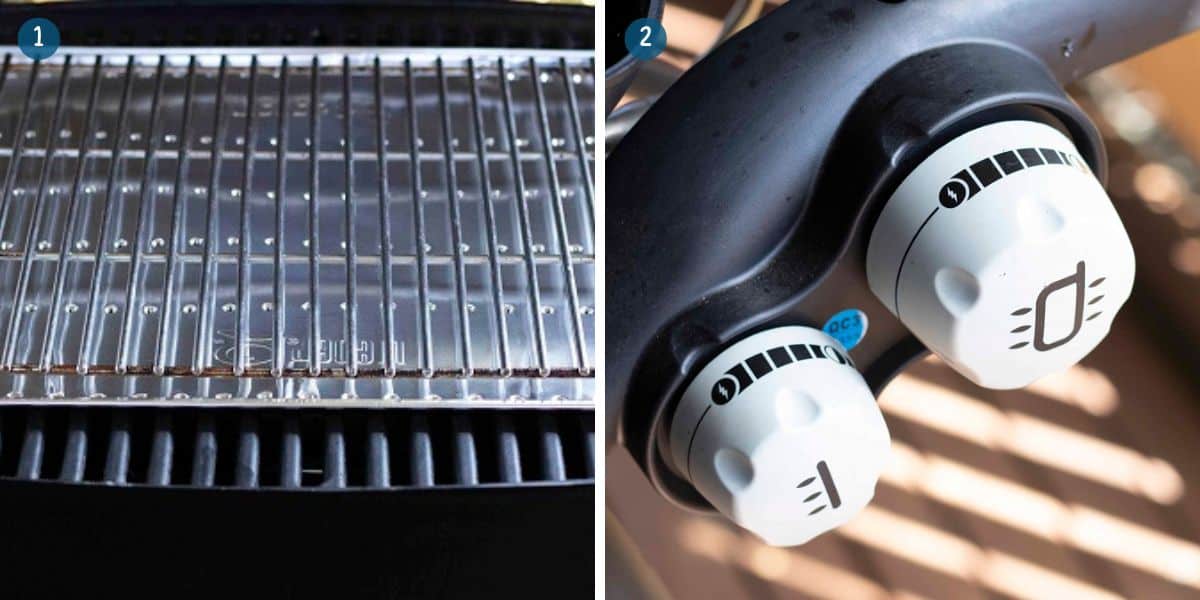
Ready to grill? Let’s set up the Weber Q for convection cooking. Place a new convection tray on the grill—Weber Q trays align perfectly with the holes on the grill to prevent any unwanted movement. Now, pop a trivet on top of the tray.
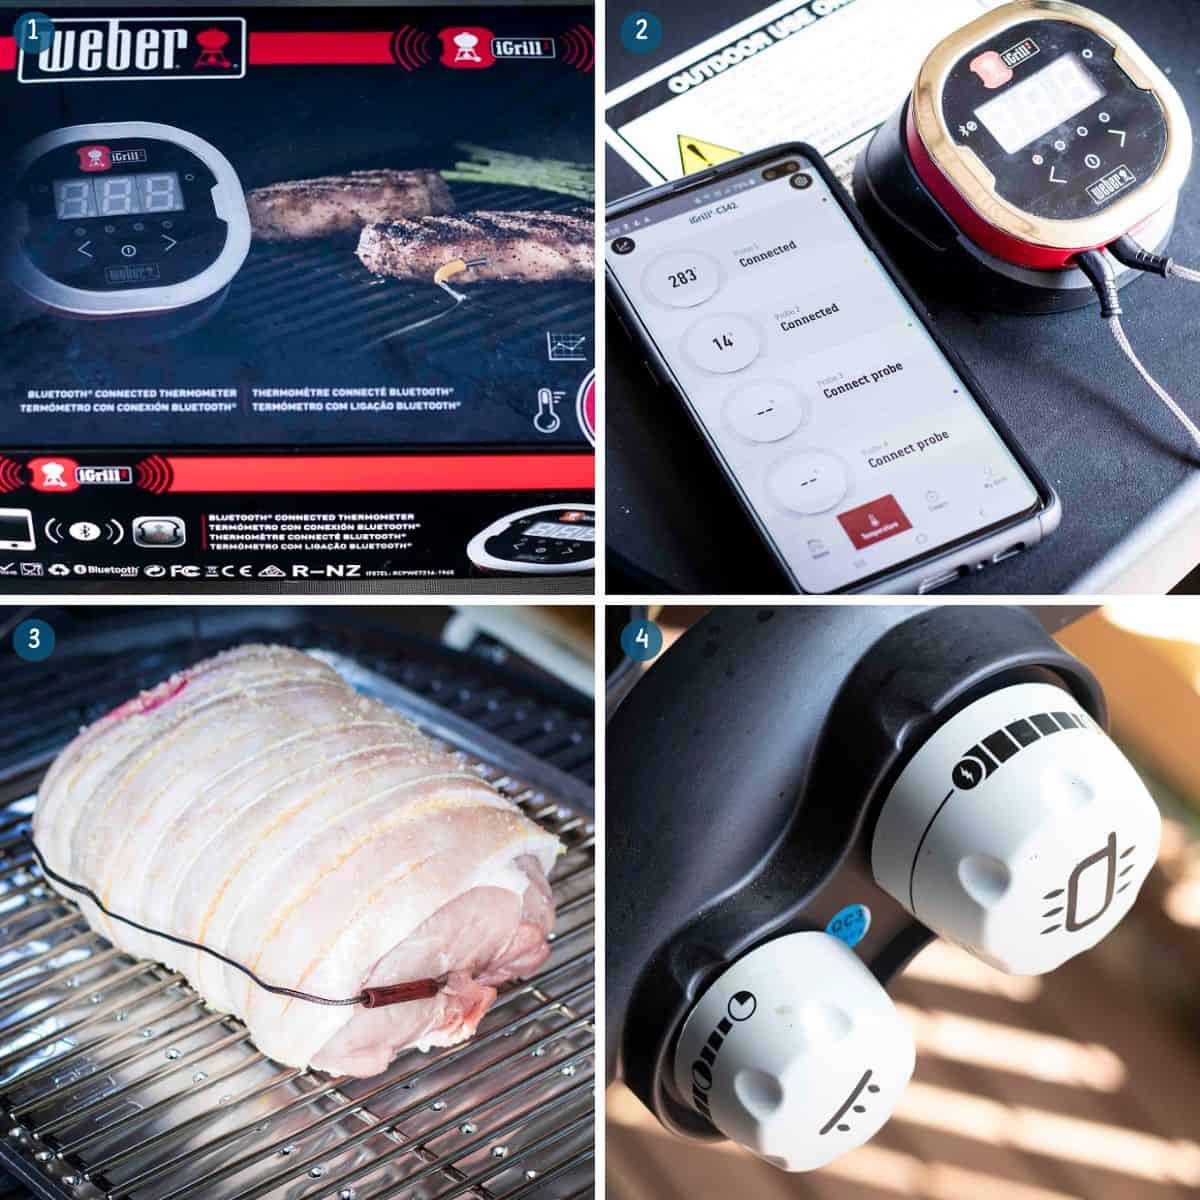
Fire up your Weber Q by turning on the gas bottle and then both control knobs to the START/HI position. Hit the ignition switch to ignite the BBQ.
Got a Weber Baby Q? Just turn the control knob to START/HI. Now is a good time to rest a meat probe on the convection tray if you have one – it’ll give you the temperature of the BBQ. Run it at this setting for 10-15 minutes to get your Weber Q hot and ready with the lid closed.
Prepare your Roast Pork
Preparing the Pork for roasting in your Weber Q
Place your pork in the centre of the trivet, and listen for that satisfying sizzle. Insert your other meat probe into the centre of the pork, but avoid the bone if there is one – we don’t want to misread the pork’s internal temperature.
Remember to close the lid to keep that heat locked in.
Maintaining the temperature of your Weber Q is key: If you’re using the Medium or Family Q series, turn the small gas control knob to the LOW position and keep the large control knob in the HI position. If you’ve got a Weber Q Baby, there is no need to adjust anything. Let your pork roast sit for about 25 to 30 minutes at this setting. Trust me, resist the urge to peek.
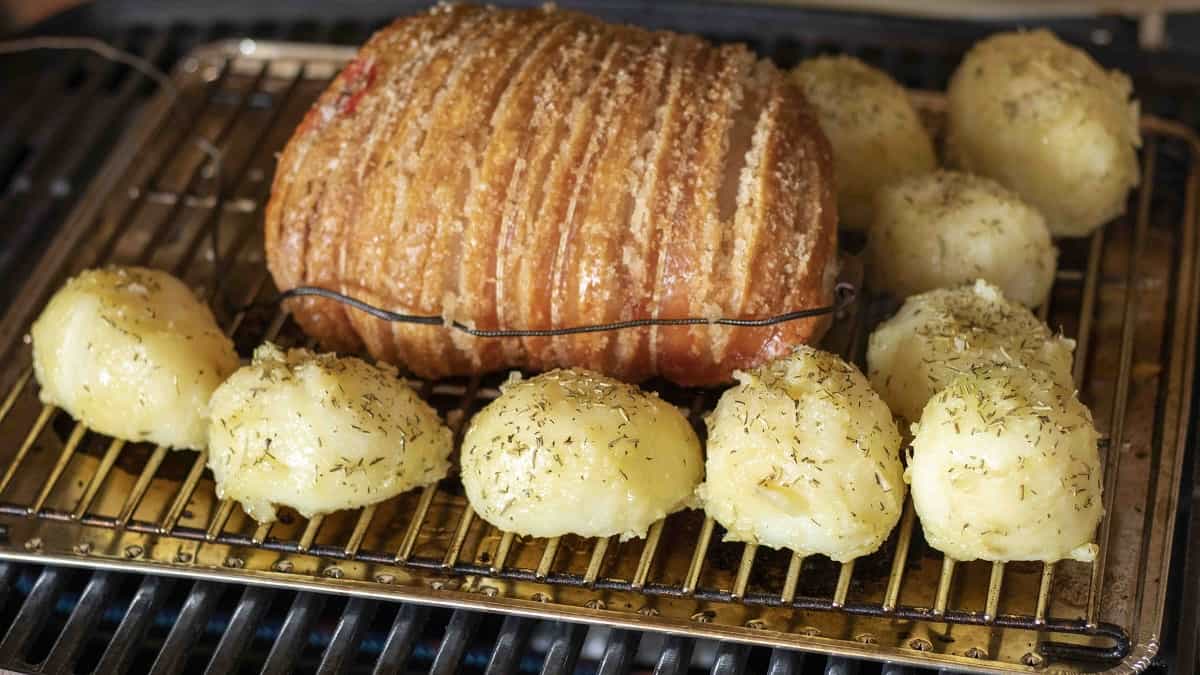
You should have crackle!
35 to 45 minutes in, your pork will already be crackling. Feel free to take a sneak peek at this point. Now, turn the smaller control knob to the OFF position and the large control knob to the ROAST position.
The temperature will start off high, but it’ll come down soon once you turn the control knob to the medium position.
And don’t worry about burning the roast. Keep the roast at around 190°C to 230°C or 375°F to 450°F at all times. Adjust the control between HI and Medium as needed.
Get the veggies on!
Once your pork hits an internal temperature of 45°C or 113°F, you can add your roast vegetables around the pork. They’ll soak up all that smokey pork goodness.
Keep an eye on your Weber Q and pork temperatures with your meat probe. When the pork’s internal temperature reaches 155°F or 68°C, you can remove the meat probe (don’t forget to wear gloves!).
Transfer the pork to a serving plate and let it rest for 10 to 15 minutes. This will bring the internal temperature to around 160°F or 71°C, which is just right for eating.
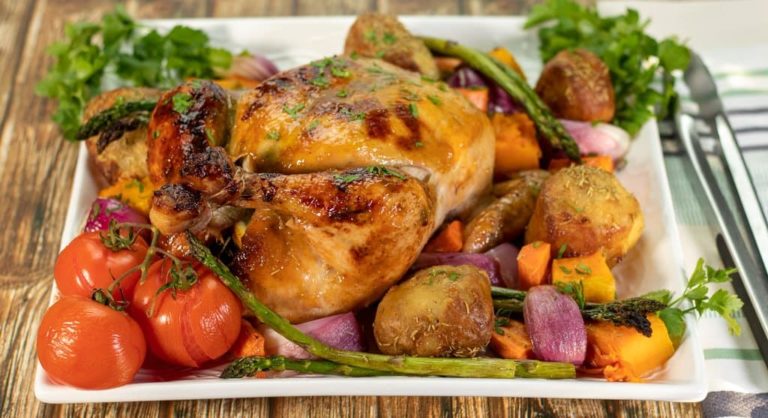
After the rest, take off the crackling and break it into bite-size pieces. Carve your meat, serve it up with those tasty roast veggies and dive in. Enjoy!
How long does roast pork take to cook in the Weber Q?
| Weight of Pork (Kg) | Weight of Pork (lbs) | Approximate Cooking Time |
|---|---|---|
| 1 kg | 2.2 lbs | 1 hour – 1 hour 30 minutes |
| 2 kg | 4.4 lbs | 2 hours – 2 hours 30 minutes |
| 3 kg | 6.6 lbs | 3 hours – 3 hours 30 minutes |
| 4 kg | 8.8 lbs | 4 hours – 4 hours 30 minutes |
| 5 kg | 11 lbs | 5 hours – 5 hours 30 minutes |
Cooktime and weight table for Weber Q roast pork
Remember, these are just estimates and can be influenced by a range of factors, such as the thickness of the roast and the precise temperature of your Weber Q grill. To ensure perfect cooking, it is highly recommended to use a meat thermometer to monitor the internal temperature of your roast.
Recipe tips
- Score Deeply: Use a sharp knife to score the skin about 2mm deep, leaving 2cm gaps, without piercing the flesh. This allows fat to render and crisp up the crackling.
- Salt Generously: Don’t skimp on salt! Rub it into the scored areas and all over the skin to draw out moisture and enhance crackling.
- Dry is Key: Pat the skin dry with paper towels before salting to remove any surface moisture that might hinder crackling.
- Oil Up: Lightly brush or spray the skin with oil just before cooking to help the salt stick and encourage browning.
- Scorching Heat: Preheat your Weber Q to around 230°C with the lid closed for at least 10 minutes. This initial blast is crucial for crackling development.
Weber Q roast pork recipe FAQ
Carving your Weber Q roast pork!

If you have followed my steps correctly, you should have a delicious, juicy pork roast when you begin carving into it, and crackling so crunchy your tastebuds are on overload.
This is the love the Weber Q provides, and I don’t know if I can ever go back to my Weber kettle. If you had a go at cooking a Weber Q roast pork, then please let me know how you went in the comments.
If it didn’t work out for you, then I am more than happy to help you figure out where it went wrong.
What else can be cooked on a Weber Q BBQ?
Luckily, you own one of the most universal BBQs available on the market, and thankfully the list is endless to what you can roast in it, Such as:
- Weber Q Roast Lamb
- Weber Q Roast Chicken
- Weber Q Roast Potatoes
- Roasted Root Vegetables With Garlic and Rosemary
And surprisingly, you can even bake on your Weber Q.
These are just some of the recipes I have tried and tested.
We’re an affiliate
We hope you love the products we recommend! Just so you know, we may collect a share of sales or other compensation from the links on this page. Thank you if you use our links, we really appreciate it!
Ultimate Weber Q Roast Pork with Crackling

Instructions
Dry out the skin overnight
- Pat the skin dry with a paper towel and spread a generous amount of salt over the skin. Place on a plate in the fridge for at least 8 hours before roasting. Overnight would be more beneficial for drying the skin out.
Preparing the pork
- Let the pork come to room temperature for at least 1 hour before continuing to the next step.
- Place a convection tray onto your grill and trivet on top, then preheat your Weber Q on high for 15 minutes with the lid down. Family Q: Preheat with both gas control knobs in the High position.
- Use a sharp knife to score the pork skin, leaving a gap of about 2-3 centimetres between each mark, being careful not to cut into the flesh underneath.
- Brush a small amount of olive oil over the skin, making sure to coat the sides and bottom. Then sprinkle a generous amount of granulated salt or sea salt flakes over the entire surface of the skin, working the salt into the score marks.
- Insert your wireless meat thermometer into the thickest part of the pork. If you are roasting pork with the bone-in, make sure not to touch the bone, as this will give you a false positive.
Roasting the pork
- Place the pork onto the centre of the trivet and immediately close the lid. Leave the gas control knob in the high position for at least 25 to 35 minutes. Family Q: leave the large gas control knob in the high position, and turn the small gas control knob down to the lowest position.
- You should have crackle by now so you can take a peek. If parts of the skin are still soft, then crank the heat for a further 10 minutes.
- Turn the temperature down and keep the temperature between 190°C and 230°C or 375°F to 450°F at all times. You can maintain this easily by monitoring your temperature and adjusting the control between HI and Medium as required.
- Once the internal temperature of the pork has reached 45°C or 113°F, it is time to add any required vegetables for roasting. Place your vegetables around the pork to absorb the smokey aroma and flavours.
- Once the internal temperature of the pork has reached 68°C or 155°F, lift the lid and carefully remove the pork. Place the pork onto a serving plate and set aside to rest uncovered for 15 to 20 minutes. This will bring the internal temperature to around 71°C or 160°F, which is considered safe for eating.
- After resting, remove the crackling and break it up into bite-size pieces. Carve your meat and serve with your roasted vegetables and gravy. ENJOY!

Just finished our trial run for xmas Crackle 10/10 and cooked to perfection
Followed your recipe to the letter
Hubby excited to get his igrill bluetooth thermometer for Xmas
Thank you so much
No problem at all, I’m very pleased it turned out for you in time for Christmas. And your husband won’t know himself when he starts using the iGrill 🙂
Perfect result for pork and crackling, thanks, only thing is put too much salt as crackling was bit salty
Well done Ray, very glad it turned out for you. I have also been guilty of oversalting the skin. Just take a knife and scrape any excess salt away from the top and in between the crackle, and that should sort you out.
Yep, followed your directions and it turned out perfect. I have a mid-sized Weber Q and i think the secret is keeping the cooking temp high as per your suggestions.. I kept it above 200 deg C for the entire time and used a probe to ensure core temp was reached – thanks, Pedro
Good on you Pedro, well Done!
My Webber has a temperature gauge, which goes up to 600, so when I am heating up Webber do I let that reach 600 or less. I did 400 but was disappointed with crackle, I must admit I did not use the specified salt, even so I would like to know exactly what temperature do I start with , put pork in for ? Then turn down temperature to? to finish. Need some help here please appreciate if you could assist, please
Hi Julie, You didn’t mention whether you have a Family Q or Baby, So I will briefly explain the instructions for both. Make sure to salt your pork the night before and refrigerate, especially if the pork is vacuum-sealed. The idea is to draw out as much moisture as possible.
Family Q: Turn both gas control knobs to the highest position/s and preheat for 10 minutes. Pop the pork in and turn the small gas control knob to low and leave the large on High for 30-35 minutes Temp should reach upwards of 250C to 270C. Then turn the small gas control knob off and the large gas control knob to medium/middle position for the remainder of the cook. Maintain a temp between 190C and 230C at all times once turned down.
Baby Q: Same instructions as the Family Q, but with only the one gas control knob. Final tip: Course sea salt is more effective to achieve an awesome crackle. Good Luck!
Hi I have a new family Q and igrill 2. I cooked a boneless pork leg to 68°, temperature controlled beautifully between 190°-200°. Pulled it off at recommended 68° I wrapped it in foil and let it sit for 20 minutes, unfortunately it was dry which confused me as I did everything you suggested. Did I let it sit to long or should I not have wrapped it after. Amy help would be fantastic. Great blog by the way
Hi Tammy. Sorry to hear your pork roast didn’t turn out. As pork rests, the temp will continue to rise. Wrapping the pork in foil will continue to cook it rapidly as it’s insulated. Just leave it to rest in the open; it will be perfect next time. Cheers!