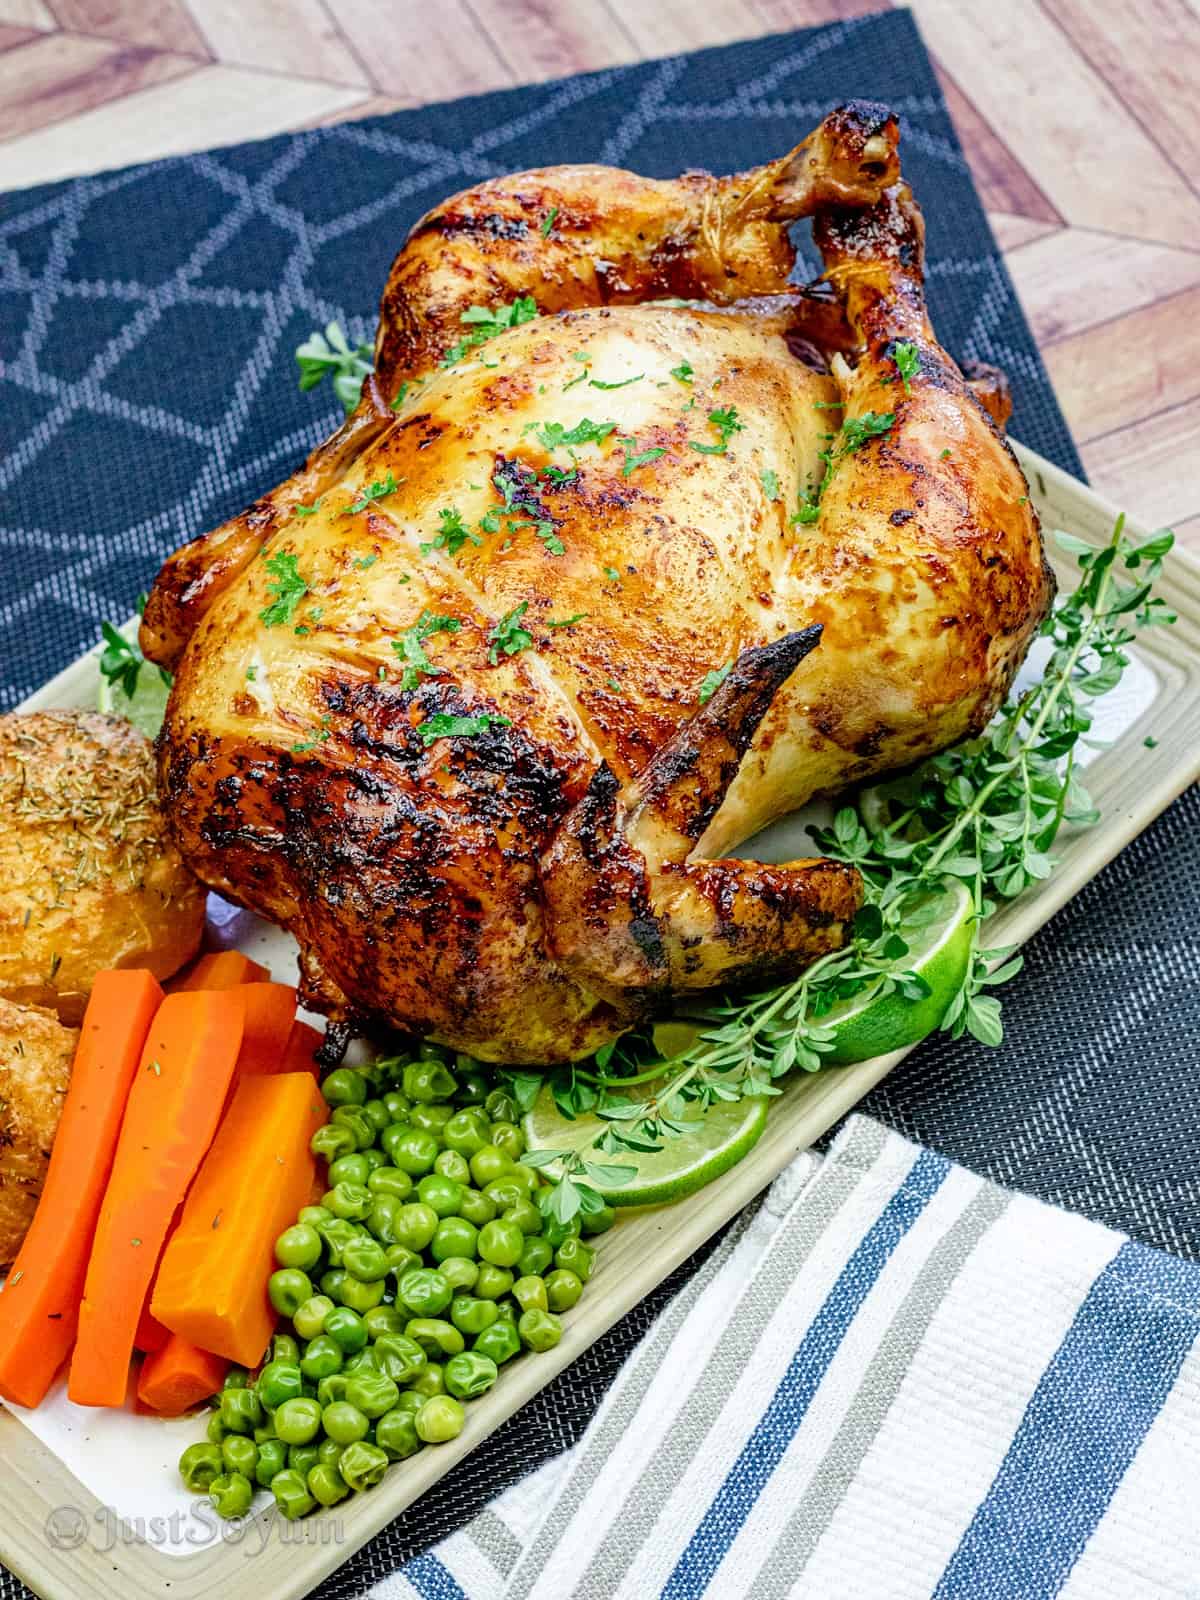
Roasted Honey and Lime Weber Q Rotisserie Chicken

Break out the spit tonight and get ready to enjoy the juiciest Weber Q rotisserie chicken you’ve ever had. It will beat store-bought roast chicken every time.
I have been deliberating over many years whether to make the leap and purchase the rotisserie kit for my Weber Q Family BBQ.
Well, I can now officially say my lovely wife Kylie made the executive decision to put me out of my misery.
For Christmas 2021, I opened a shiny new rotisserie kit for my Weber Q. I was very excited, to say the least.
So over the last couple of months, I’ve been playing with my new toy and trying out some great recipes.
And today’s recipe is a doozy.
Just the thought of honey and lime infused with a roasted Weber Q rotisserie chicken is enough to get the mouth-watering.
If some of you guys are looking to start getting into rotisserie cooking and don’t have the kit.
You can grab your shiny new Weber Q rotisserie kit on amazon.
So no more dilly-dallying, let’s get you guys cooking.
Ingredients you’ll need to make Weber Q rotisserie chicken
I thought I would keep this one simple and limit the number of ingredients, but of course, always maximise the flavours.
So although the ingredients are minimal, the flavour is insanely good.
Ingredients:
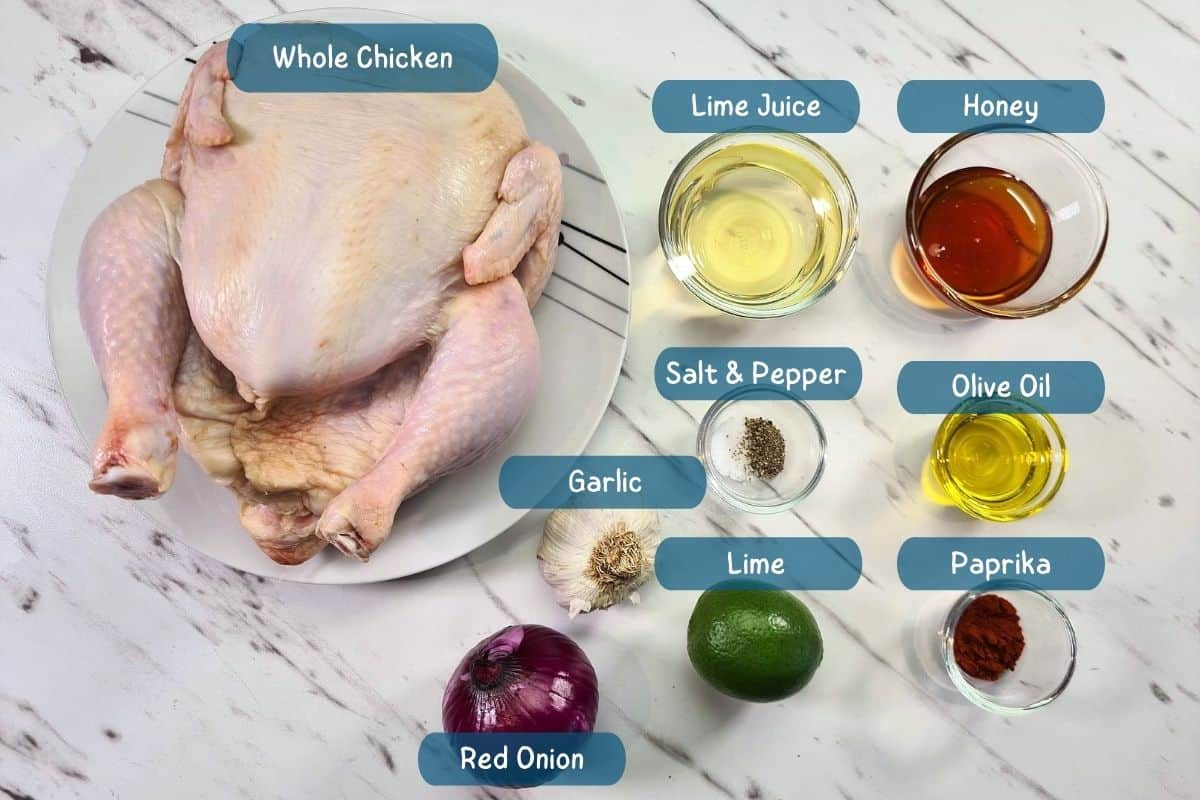
- Whole chicken
- Lime
- Red onion
- Garlic
- Salt & ground black pepper
- Olive oil.
Glaze:
- Lime juice
- Paprika
- Honey
How to prepare rotisserie chicken on the Weber Q?
Most store-bought chickens are vacuum-sealed and tend to sit in a combination of preservatives and juices.
So it’s essential to wash the chicken, including the cavity, under cold water from the beginning.
Then dry the chicken with a paper towel, and it’s ready to start seasoning.
But first, we need to get the Weber Q rotisserie kit set up and pre-heated.
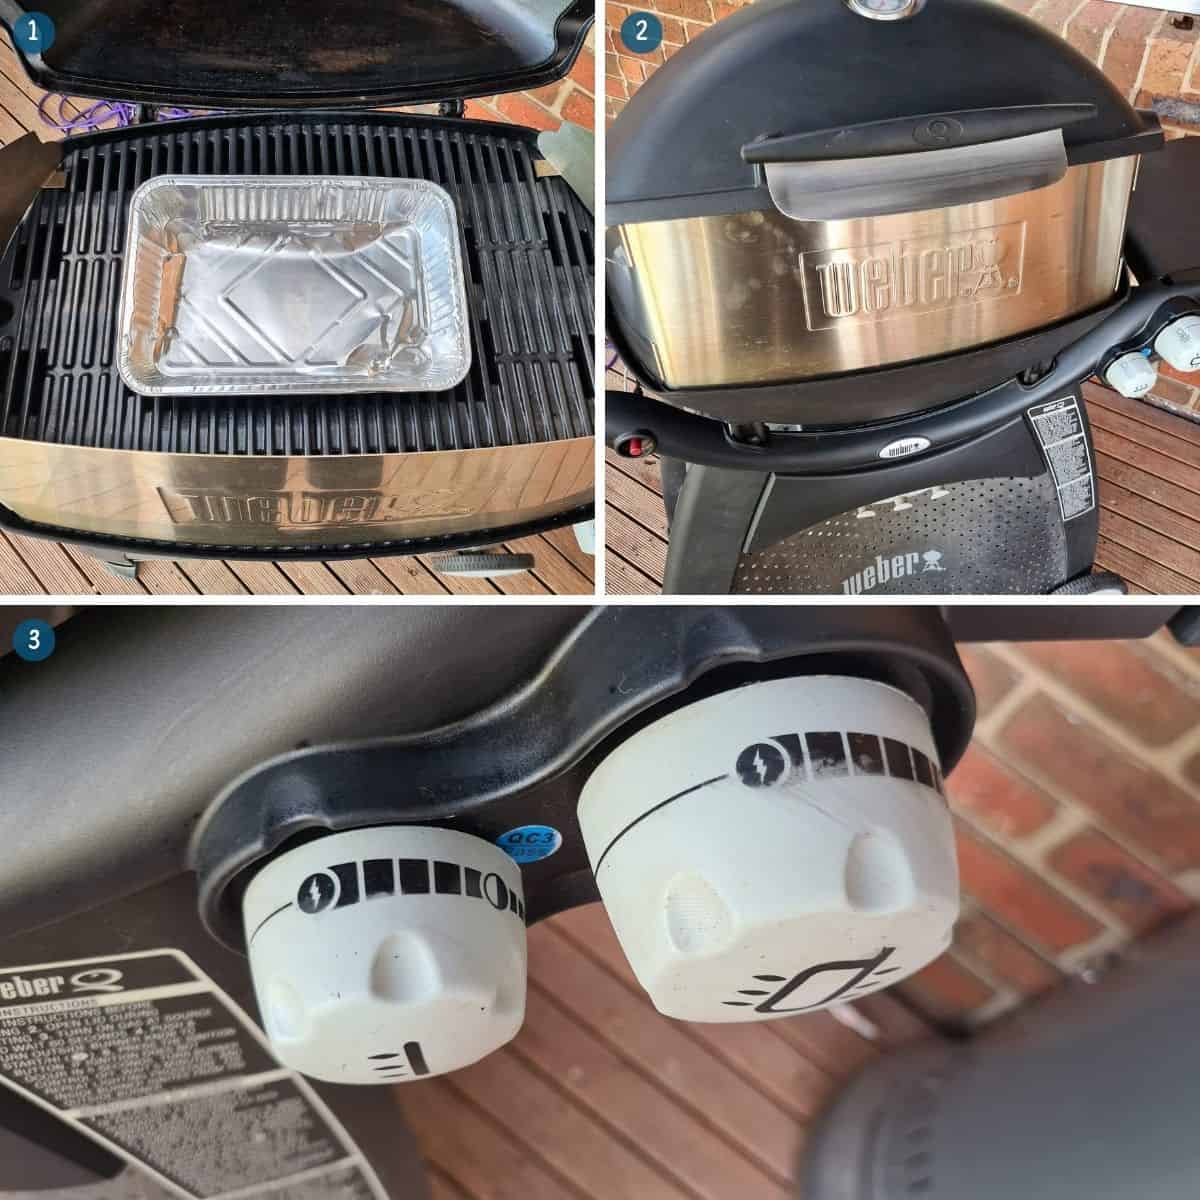
Place a foil tray onto the centre of the grill to catch the juices, and pre-heat the Weber Q for 10 minutes on High with the lid closed.
Now, back to our chicken.
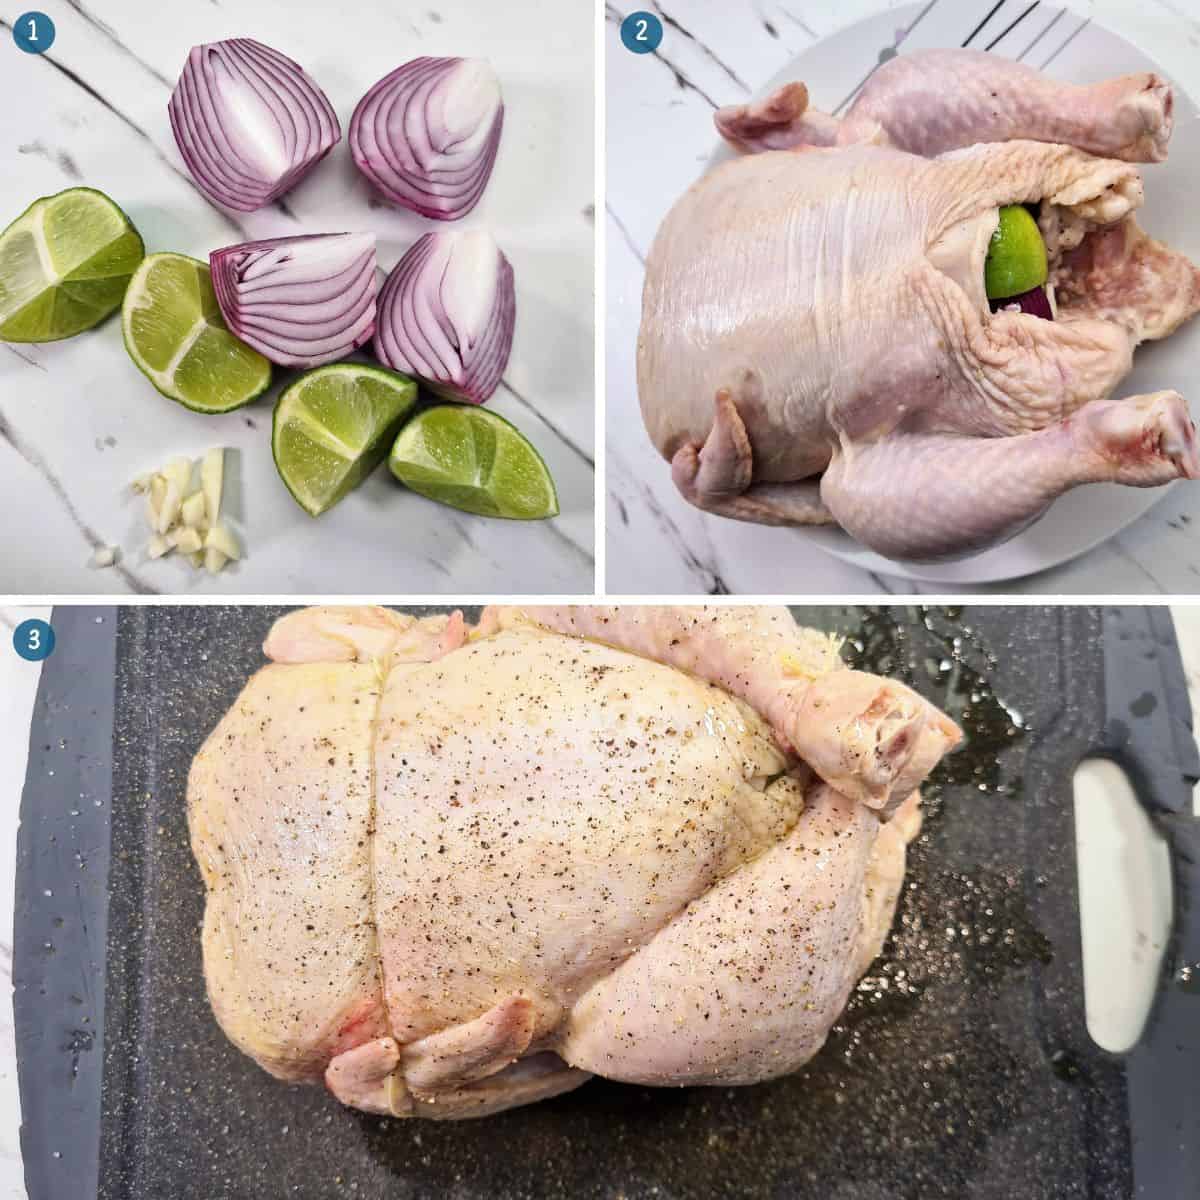
Season the cavity with salt & pepper, chop the garlic, then cut one lime and onion into quarters.
Add the lime, onion, and garlic into the cavity and tie the legs and wings with cooking twine.
Lastly, drizzle olive oil over the chicken and season the skin with salt & ground black pepper.
How to put a chicken on a rotisserie spit?
Most of you guys will already know how to do this, but for the newbies that have never used a rotisserie, I will try to help you.

Carefully insert the spit rod through the cavity and out through the neck, ensuring that the chicken is in the centre.
Next, push the forks into both sides of the chicken and tighten the bolts to secure them in place.
Safety First
I know you can’t wait to start roasting your Weber Q rotisserie chicken.
But it would be irresponsible of me not to mention your safety while using the rotisserie.
The Weber Q was designed to be incredibly hot, so it is hazardous to place the rotisserie spit onto the heat shield without protecting your hands first.
Ensure you have a quality set of heat resistant bbq gloves on hand.
The moment you open the lid on your Weber Q and try to place the spit, you could get burned.
You can get an awesome set of Inkbird bbq gloves from Amazon if you don’t have anything at home.
They are heat resistant and will keep your hands from burning.
How to cook roast chicken on the rotisserie?
Yes, I know you already knew about wearing gloves.
But I would never forgive myself if somebody was injured and didn’t get to enjoy the best chicken they’ve ever cooked.
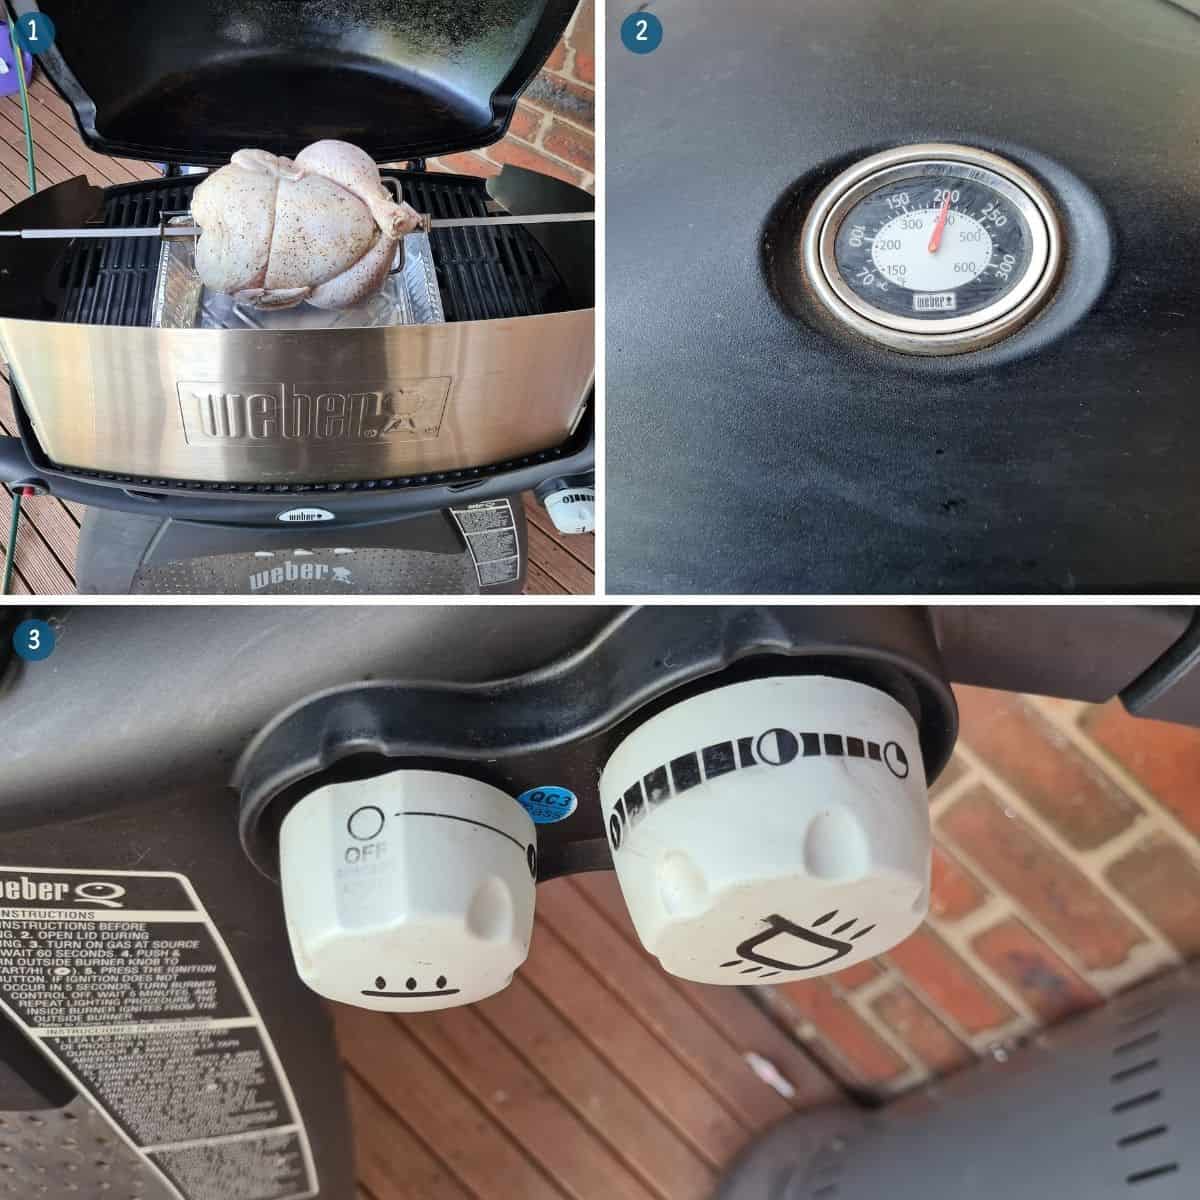
Carefully lift the lid on your Weber Q and place the spit rod onto the heat shield. You should see two little grooves.
Then push the rod all the way into the motor. Close the lid and start the rotisserie motor.
If you see the spit rod turning a complete 360°, then you have set the rotisserie up correctly.
Turn the gas control knob to the middle position, and your Weber Q rotisserie chicken is off and racing.
If you’re using the Family Q, just remember to turn the small gas control knob off and the large gas control knob to the middle/medium position.
Pro Tip: I know it can be tempting to take a peek at the progress of your roast chicken. If the lid is open, the Weber Q will lose heat quickly. Just remember, “If you’re looking, it ain’t cooking.”
Try to keep your Weber Q within a temperature range of 180°C (355°F) and 210°C (410°F) at all times.
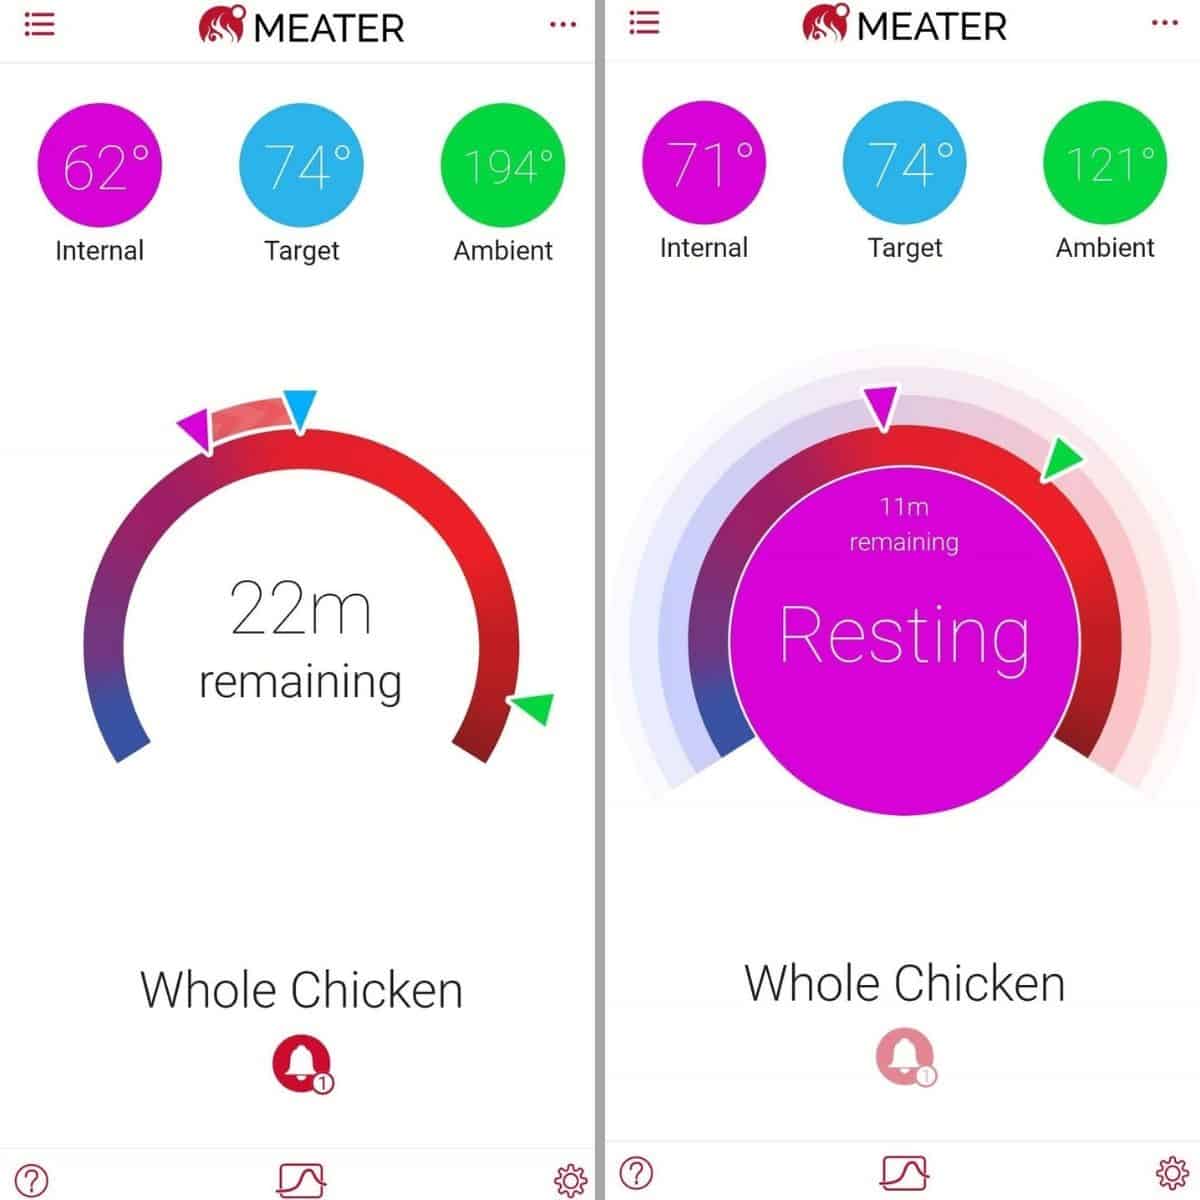
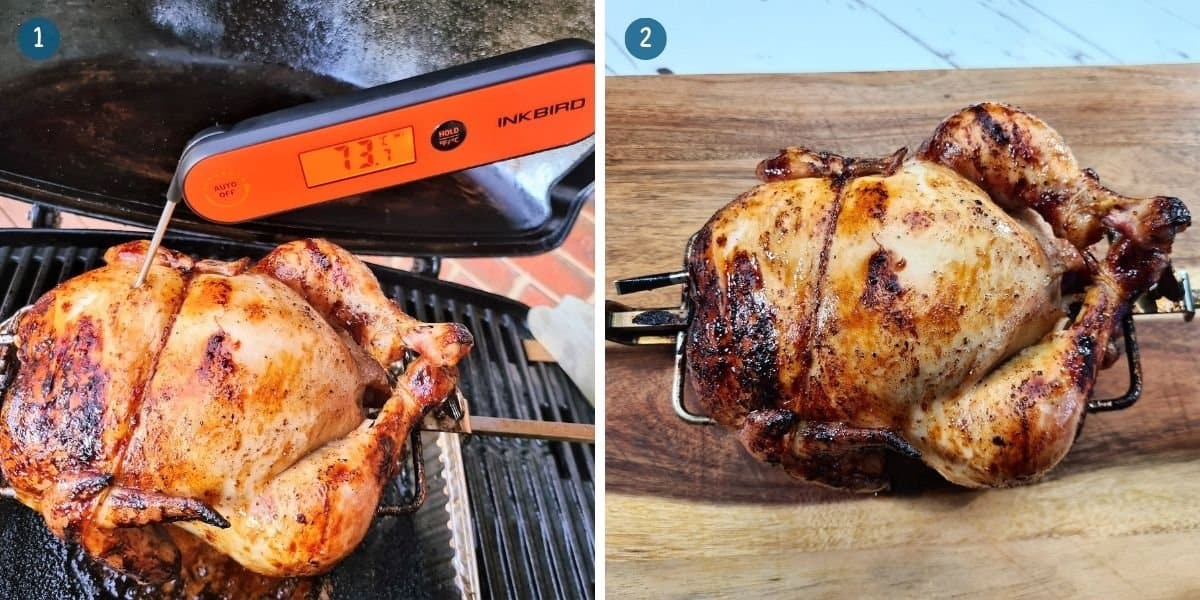
And cook until the internal temperature of the chicken is 71°C (160°F).
Once the internal temperature has been reached, rest it under foil for 15 minutes.
While resting, the temperature will rise to 74°C (165°F), making the chicken safe for eating.
Making the honey and lime glaze
This glaze is terrific and simply adds a new dimension to the outside of the chicken.
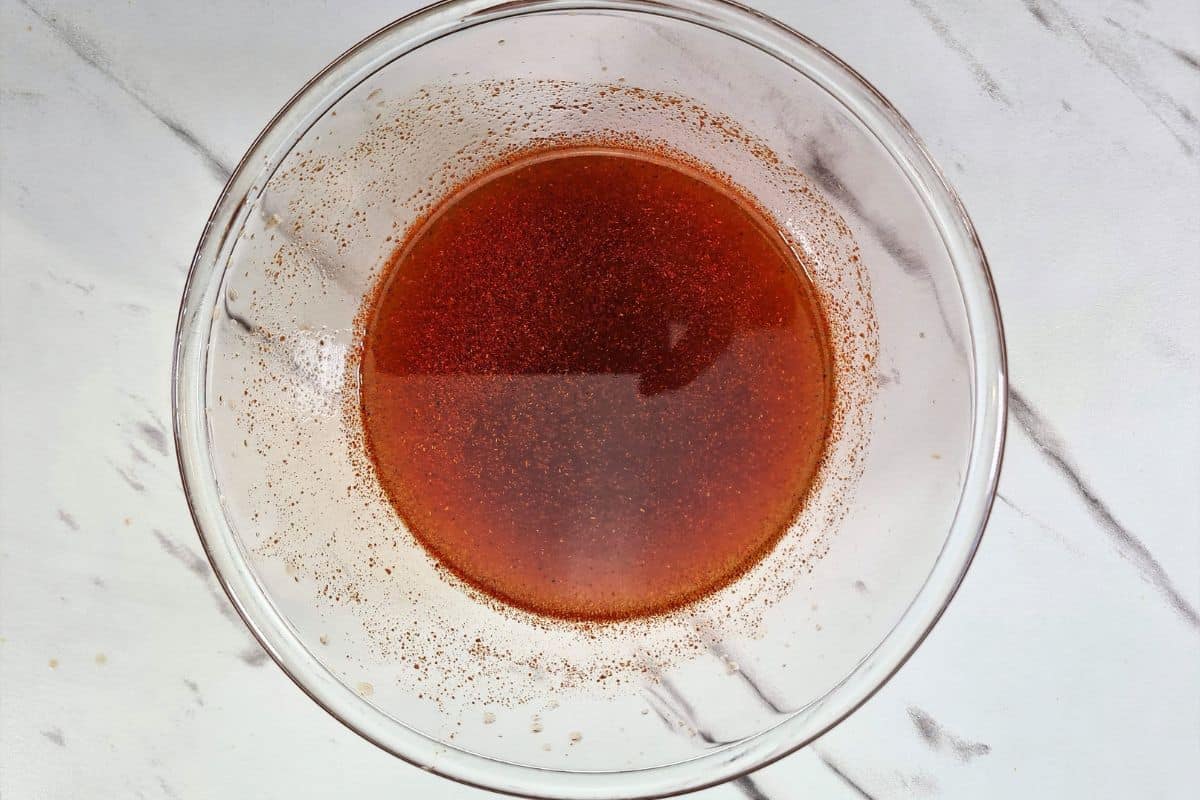
Into a small bowl, add lime juice, paprika and honey.
Mix well and brush on when the Weber Q rotisserie chicken has about 30 minutes left to cook. Just remember to stop the motor first.
I know you already knew that!
How to tell if a roast chicken is ready for eating?
There are only two ways to tell if your chicken is ready for eating.
- Using an instant-read meat thermometer
- Pricking the chicken to see if the juice is running clear.
I find using a wireless meat thermometer such as the meater+ the simplest method.
It is purpose-built for rotisserie cooking and can be used on almost anything when cooking with meat.
Although there is a drawback with the meater+, it is expensive. But it will always give you accurate results and even an estimated cook time.
This way, you know exactly when to get the veggies on.
I have another great option that is easier on your wallet. And that’s the Inkbird instant-read thermometer.
It’s way cheaper and deadly accurate.
The second way to tell if your chicken is ready is to do the prick test.
You can do this by pricking the thickest part of the thigh or breast and checking if the juice that comes out is running clear.
If it’s clear and not a pinkish tone, then it’s ready.
The problem with the prick test is that you continuously need to open the lid of your Weber Q, letting out heat.
And you run the risk of overcooking the chicken.
Do you have any leftovers?
There are so many options you can do with the leftovers.
We often use the leftovers to make a chicken salad wrap with homemade mayonnaise. Roast chicken on a salad wrap is beautiful.
Another recipe we love to use with leftover chicken is our chicken and bacon caesar salad.
Or how about something completely left-field and try our Chinese chicken and sweet corn soup.
We’re an affiliate
We hope you love the products we recommend! Just so you know, we may collect a share of sales or other compensation from the links on this page. Thank you if you use our links. We really appreciate it!
Roasted Honey and Lime Weber Q Rotisserie Chicken

Ingredients
- 2.2 kg whole chicken
- 1 lime quartered
- 1 red onion quartered
- 3 garlic cloves finely chopped
- ½ cup lime juice
- 2 tbsp honey
- 1 tsp paprika
- 2 tbsp olive oil
- salt & ground black pepper to taste
Instructions
Preparing the Chicken
- Bring your chicken up to room temperature for at least 1 hour before roasting.
- Set up your Weber Q by placing a foil tray onto the centre of the grill, then place the heat shield and connect the rotisserie motor. Preheat your Weber Q for 10-15 minutes on HIGH with the lid down.
- Rinse the chicken thoroughly under cold water and dry with a paper towel.
- Season the cavity with salt and pepper. Place chopped garlic, quartered lime and quartered onion into the cavity and tie the legs and wings together with cooking twine.
- Drizzle 1-2 tbsp of olive oil over the entire chicken and season with salt & pepper.
- Secure the chicken onto the centre of the rotisserie spit and secure the forks. Then carefully place the spit rod onto the heat shield, and turn the motor on. Close the lid and turn the heat down to the Middle position.
- Try to maintain a temperature between 180°C (355°F) and 210°C (410°F).
Glaze
- In a small bowl, mix ½ cup lime juice with 1 tsp paprika 2 tbsp honey. When the chicken has approximately 30 minutes left in the cook, stop the motor and brush the glaze onto the chicken.
- Roast until the internal temperature of the chicken reaches 71°C (160°F) in the thickest part of the breast or juice is running clear.
- When removing the chicken from the Weber, tilt the chicken upright so the juices from the cavity drip into the foil pan. Rest for 15 minutes under aluminium foil. The temperature will continue to rise 3-4°C, bringing the chicken to a safe eating temperature of 74°C (165°F).